Admin Guide | Security Overview | Micro Call Center Guide | Contact
Guide for Interpreters
Guide for Interpreters PDF download
Prerequisites
- Confirmed staff interpreter account in the MERFi system
- Stable internet connection (please see minimum requirements below)
- Desktop or laptop with camera
- Preferred: USB connected headset with microphone
- Preferred: Neutral background and good lighting
MERFi Minimum Requirements
- Computer Setup: Desktop or laptop (tablets or mobile devices are not permitted) with an HD webcam (built in or external) and a connected USB headset.
- Operating Systems: Windows 10; Mac OS X 10.14 or newer
- Note: If using a Windows device, Google Chrome is only supported at this time. If using an Apple device, Apple Safari is only supported at this time. Google Chrome is not recommended for Apple devices.
- Memory (RAM): 4 GB
- Supported Browsers: Google Chrome (only use on Windows devices); Apple Safari (only use on Apple/Mac devices; Google Chrome is not recommended on Apple/Mac devices)
- Internet Connection: Hardwire connection from computer to internet router via Ethernet cable preferred
- Internet Speed/Bandwidth: 500 Kbps Up / 1.2 Kbps Down
Configure Your Browser
Before logging into MERFi for the first time, you’ll need to configure your browser to ensure a proper connection. The steps to do this will differ depending which browser you’re using to conduct the interpreting session. Instructions are below for both Google Chrome (Windows users) and Apple Safari (Apple/Mac users).
Windows Users: Configuring your Google Chrome Settings
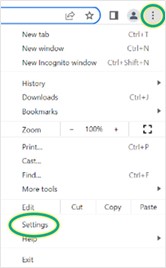
- Open Google Chrome
- Click the 3-dot icon at the top-right hand corner, then click Settings. A new tab will open with the Settings options.
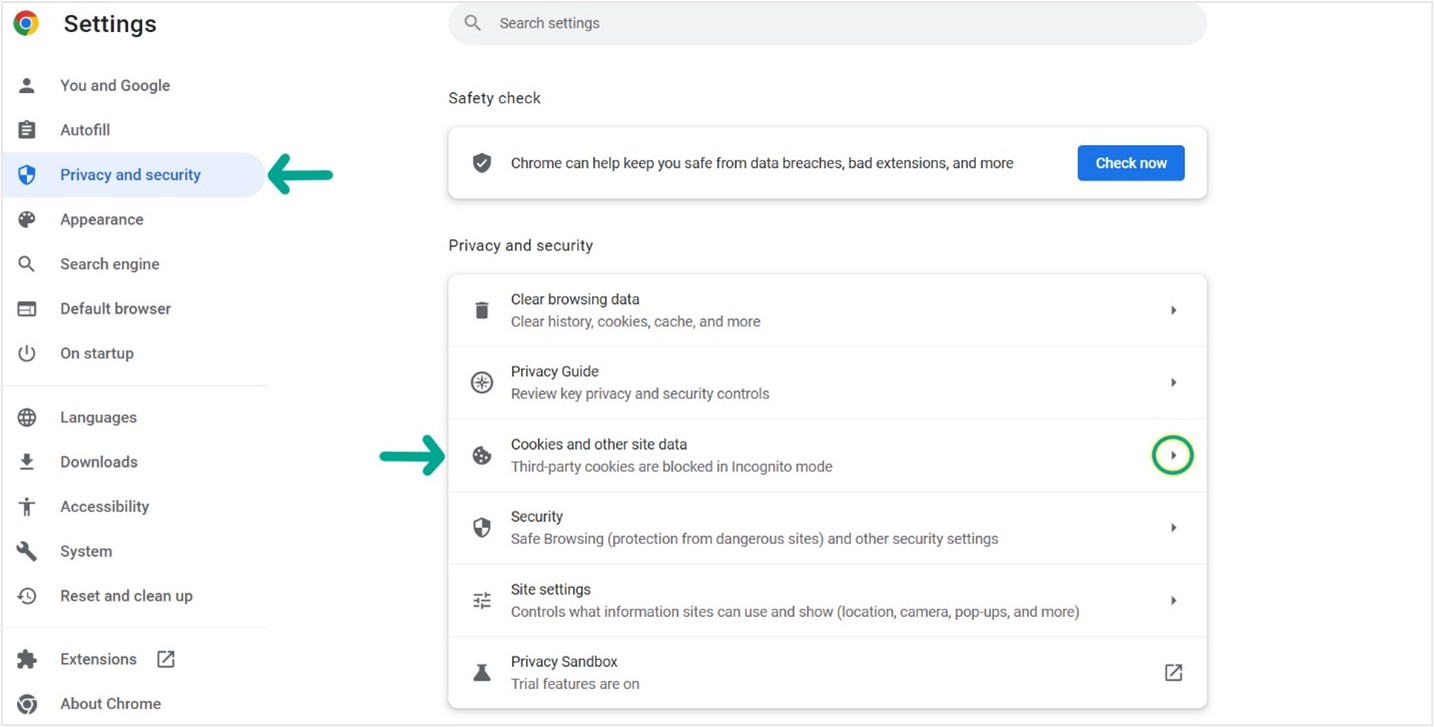
- On the left, click Privacy and Security.
- Click Cookies and other site data.
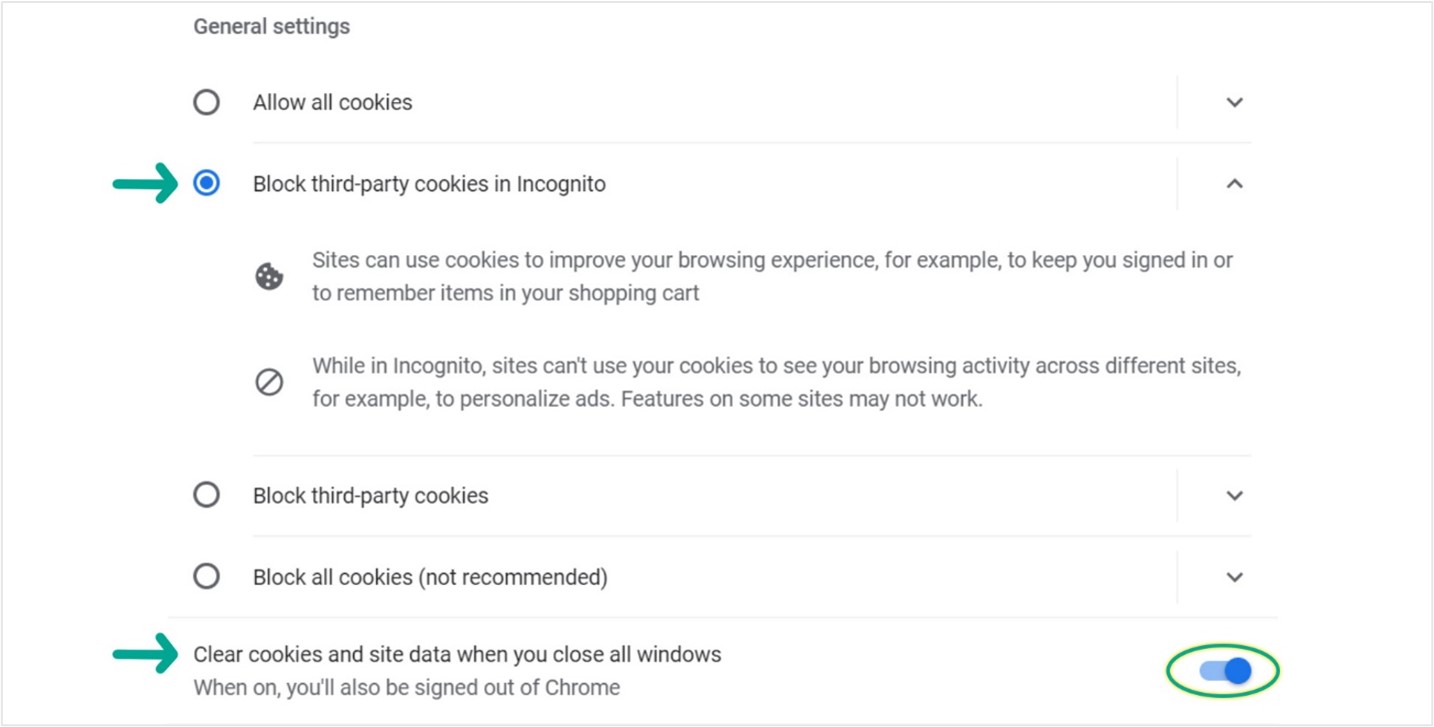
- Under the General Settings:
- Select Block third-party cookies in Incognito.
- Switch toggle on Clear cookies and site data when you close all windows.
- Note: Windows 11 users can skip this step.
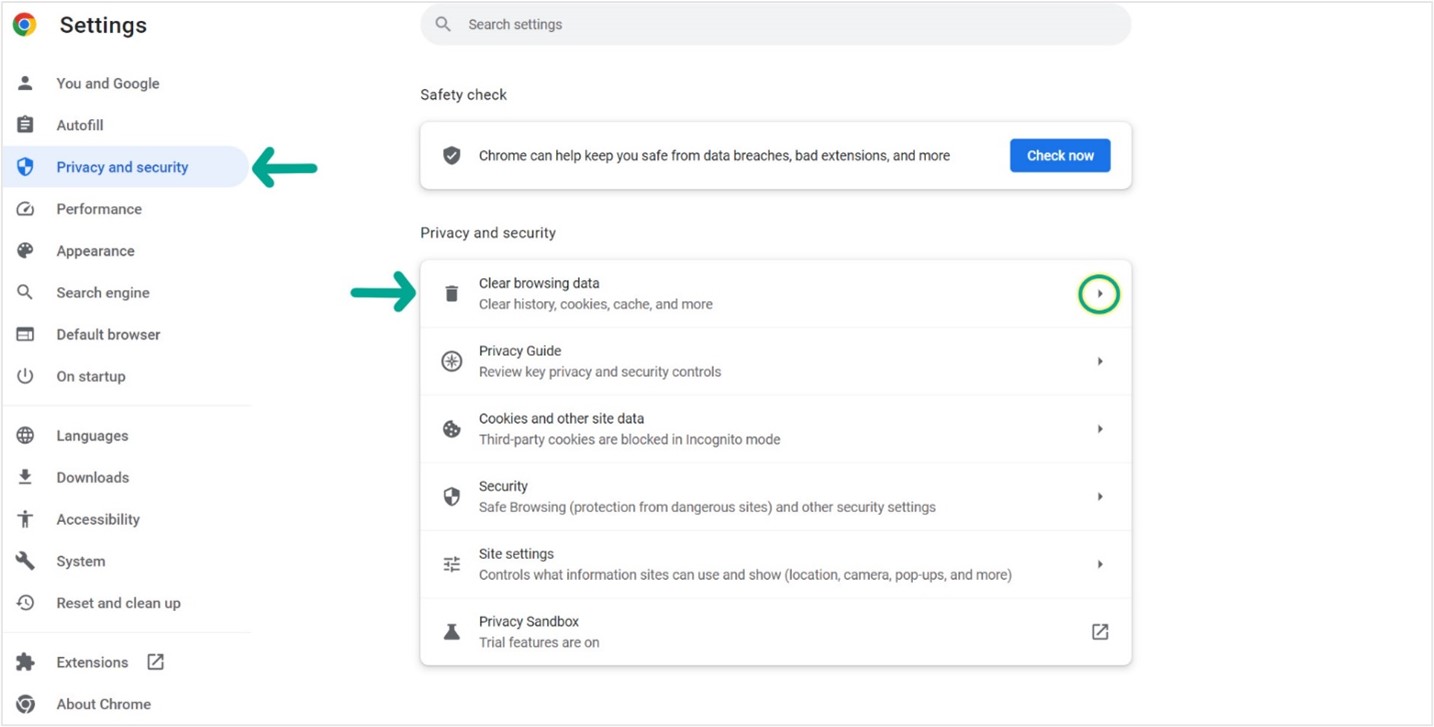
- Click on Privacy and Security again.
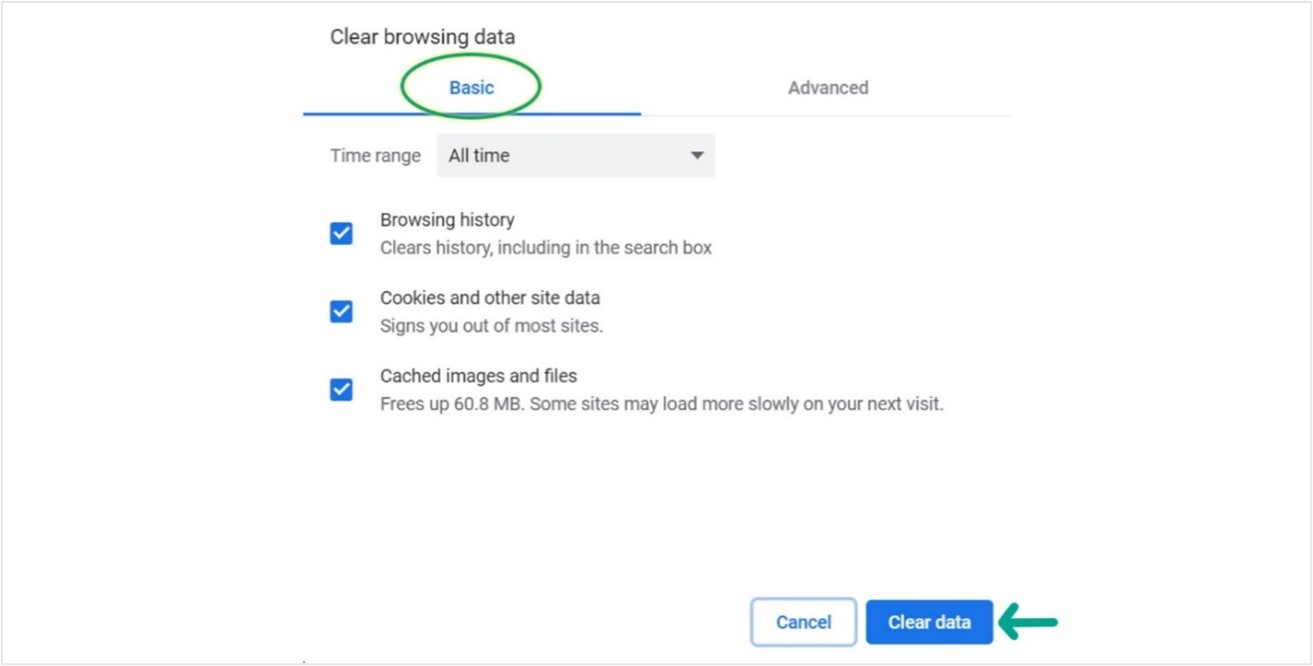
- Click Clear Browsing Data.
- Click on the Basic tab.
- Change Time range to All time.
- Check boxes for Browsing History, Cookies and other site data, and Cached images and files.
- Select Clear Data.
- Exit out of your browser and reopen a new one before logging into MERFi.
Apple/Mac Users: Configuring your Apple Safari Settings
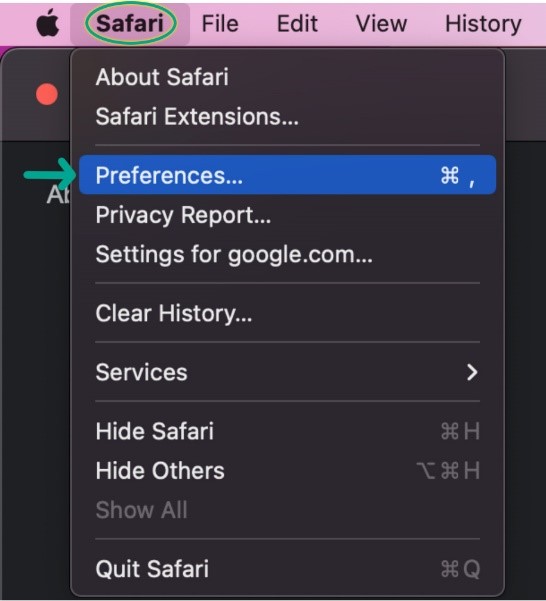
- Open Safari.
- On the Menu Bar, select Safari, and then Preferences.
- Select the Privacy tab.
- Uncheck Website tracking: Prevent cross-site tracking.

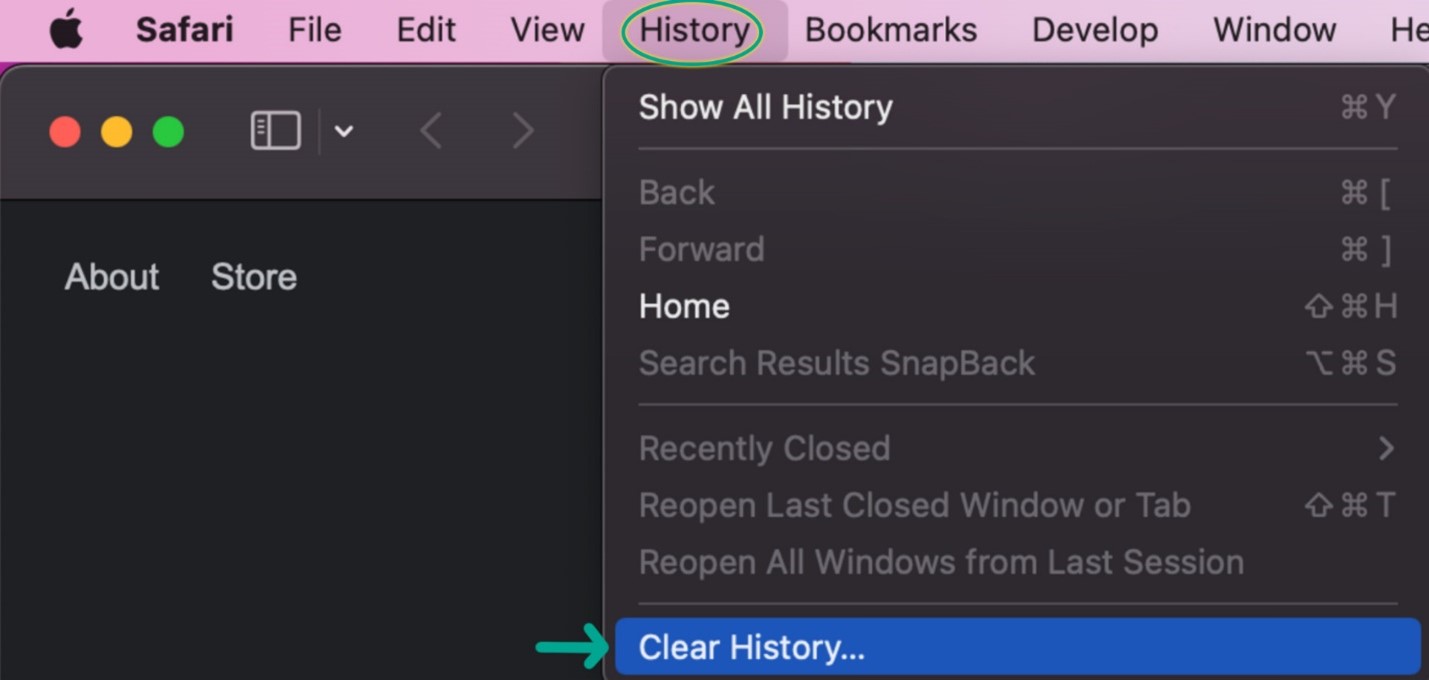
- on the Menu Bar, select History, and then Clear History…
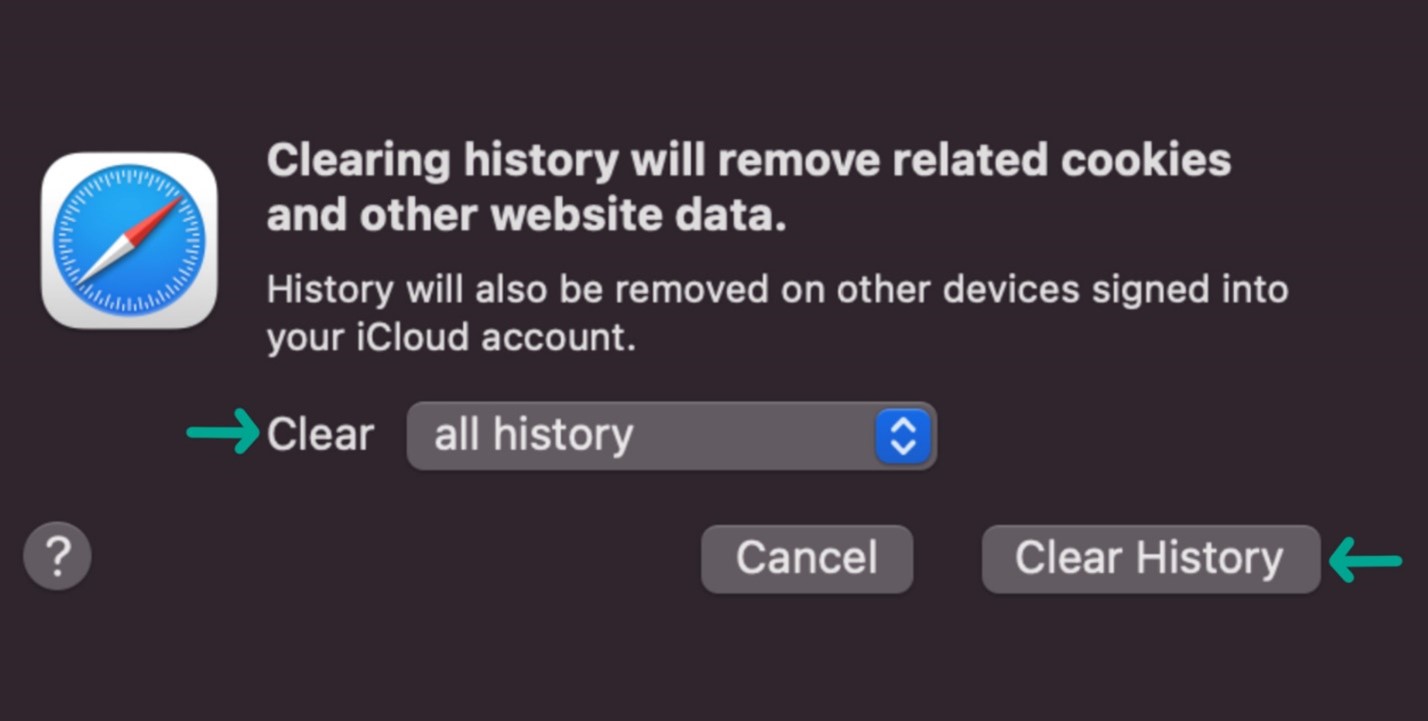
- Change Clear to all history.
- Click Clear History.
- Exit out of your browser and reopen a new one before logging into MERFi.
Step 1: Setting up your MERFi Account
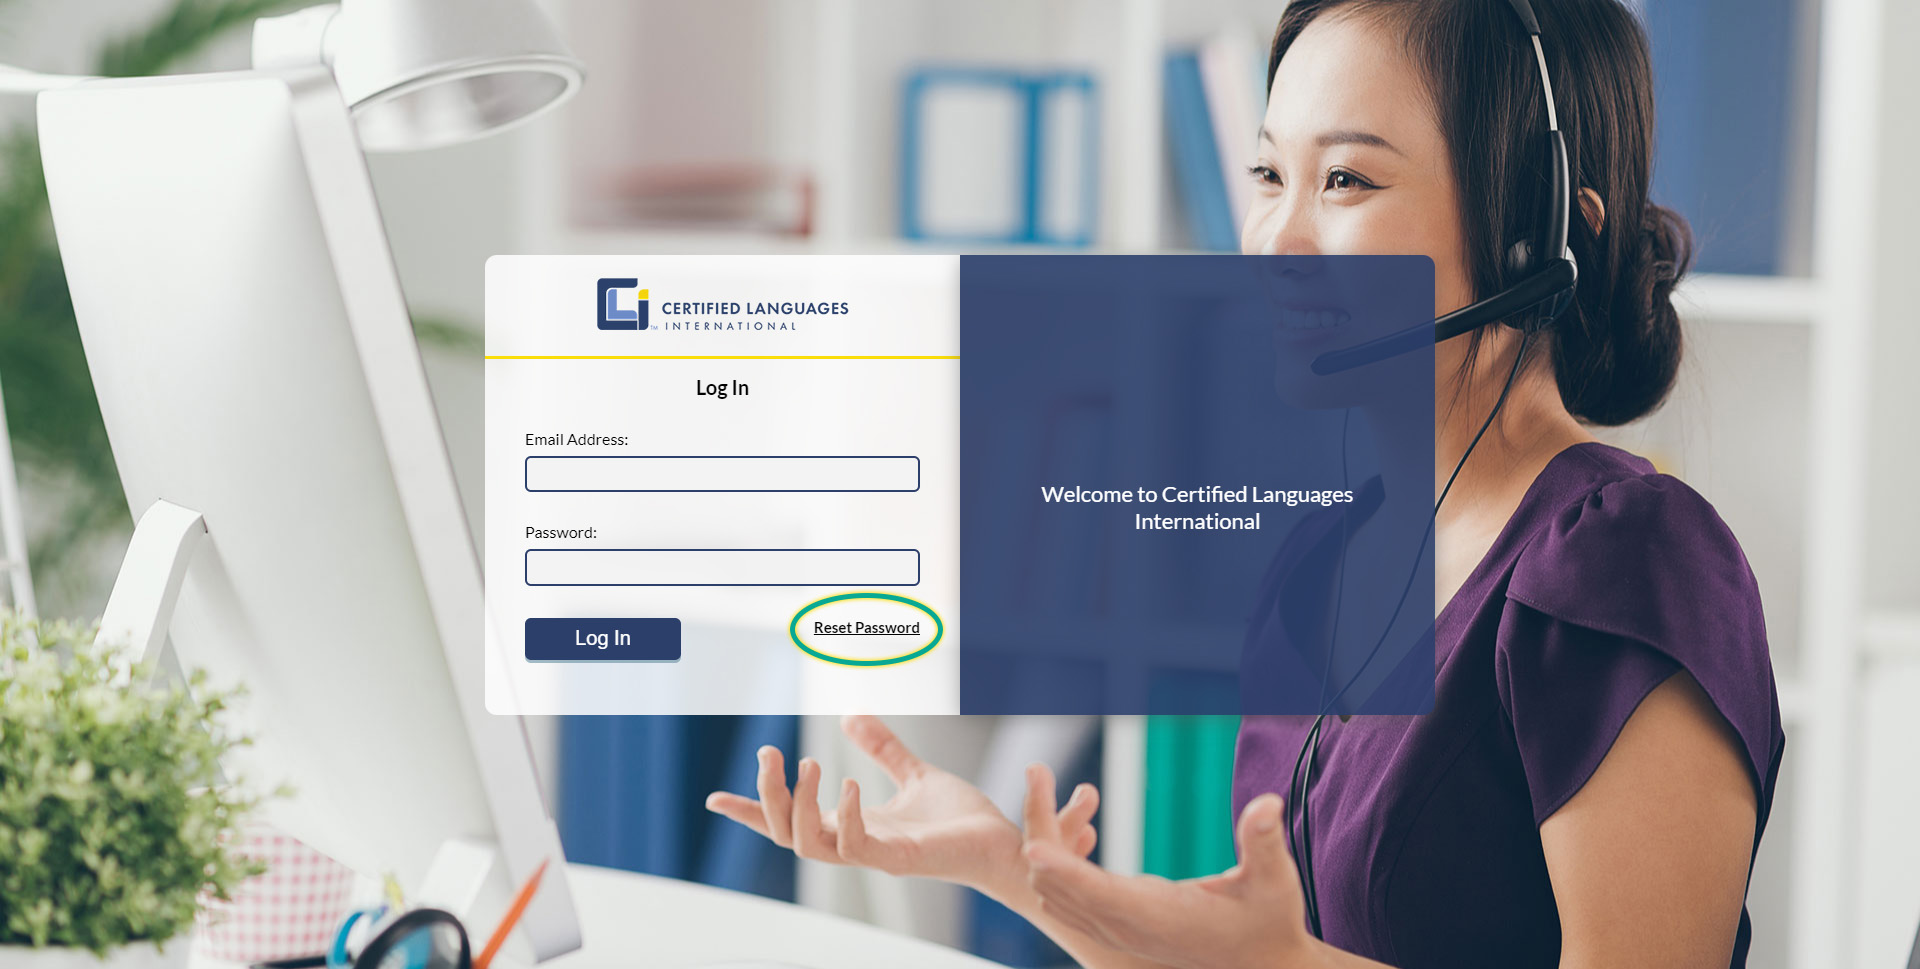
- Visit the MERFi interpreter login page.
- Click Reset Password.
- Enter your email address and hit Submit.
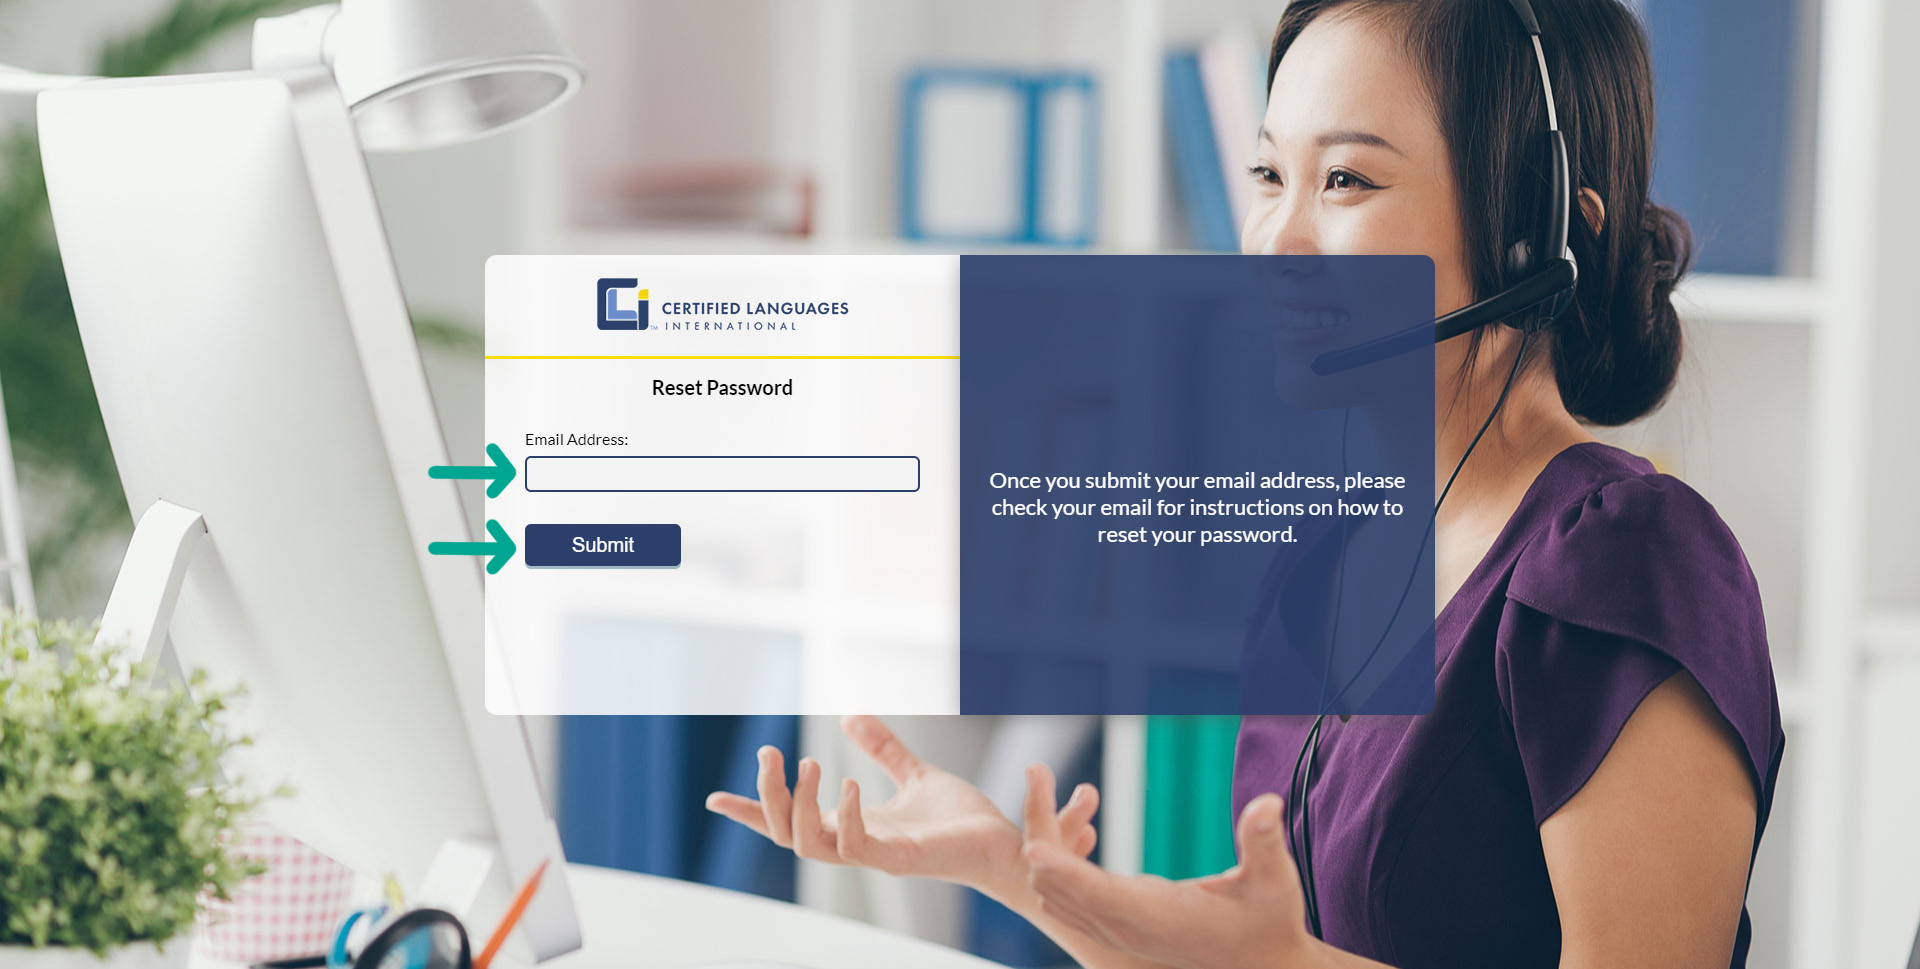
- You will receive an email from DoNotReply@clilang.com with the subject “Forgot Password Notification.” Click the link in the email to reset your password.
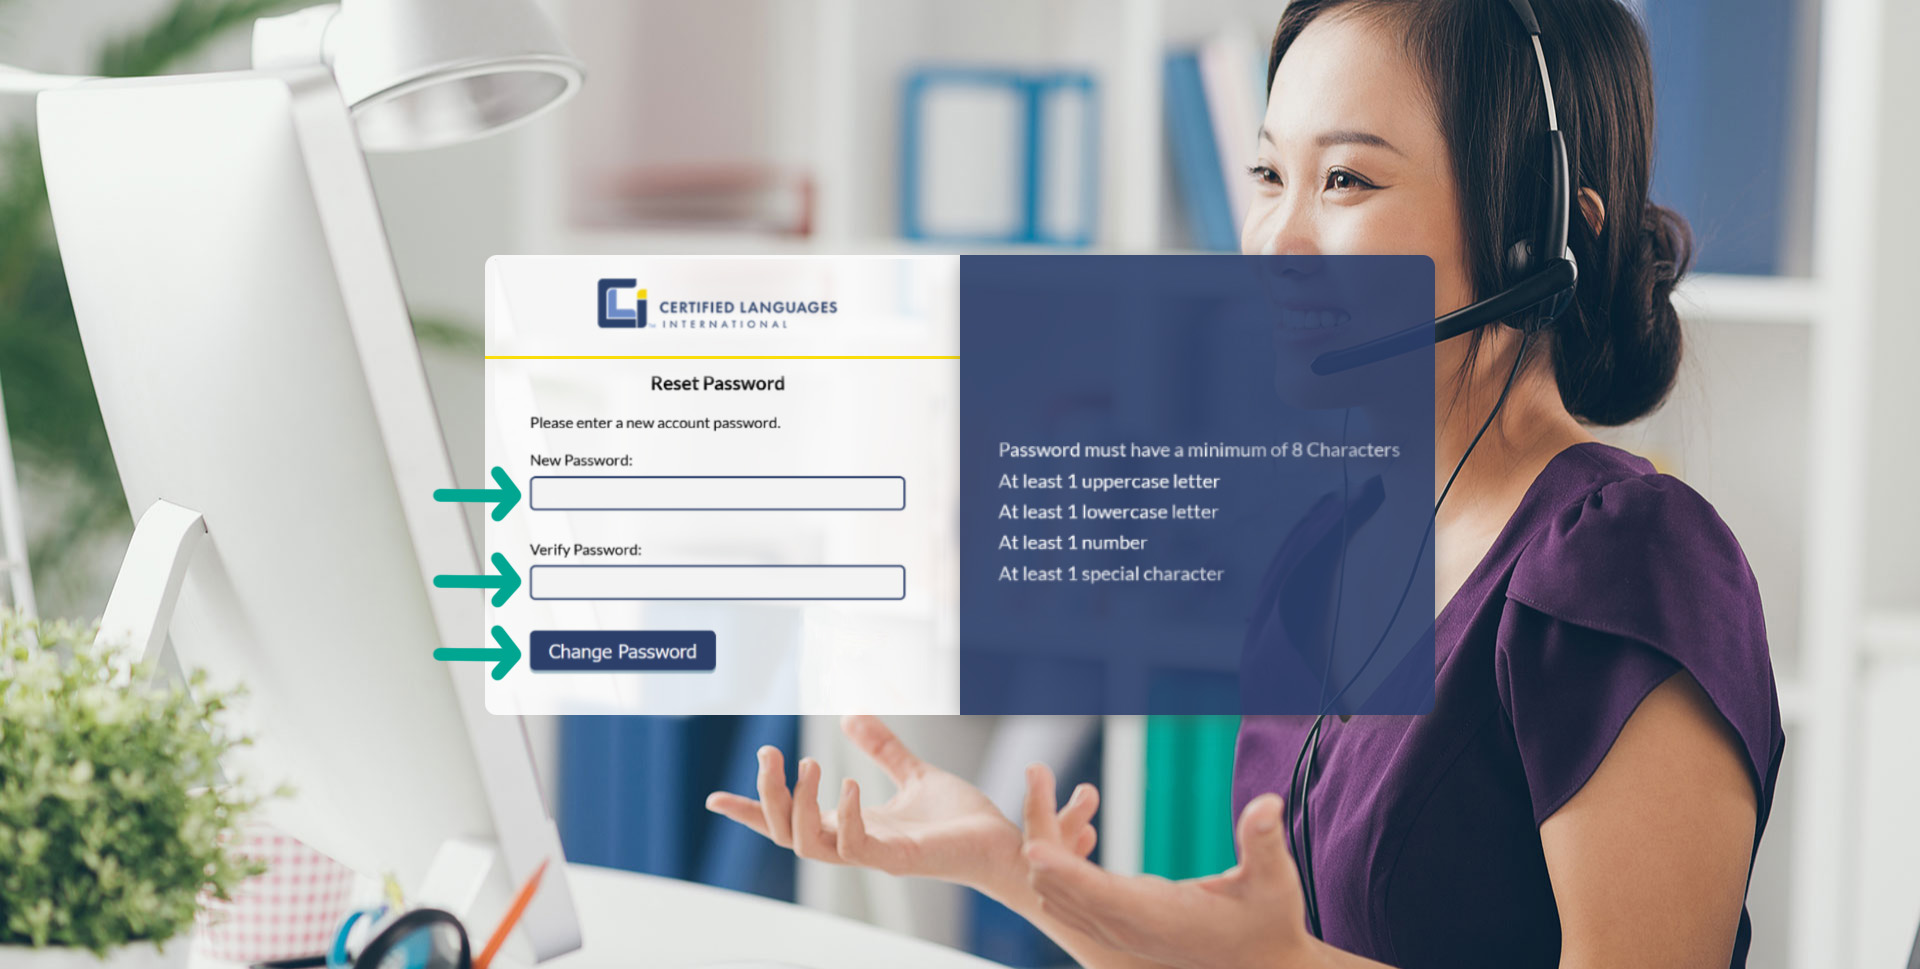
- Type in your password in the New Password field. Repeat password in the Verify Password field.
- Click Change Password.
- Note: Password requirements are located to the right.
Step 2: Logging in to MERFi
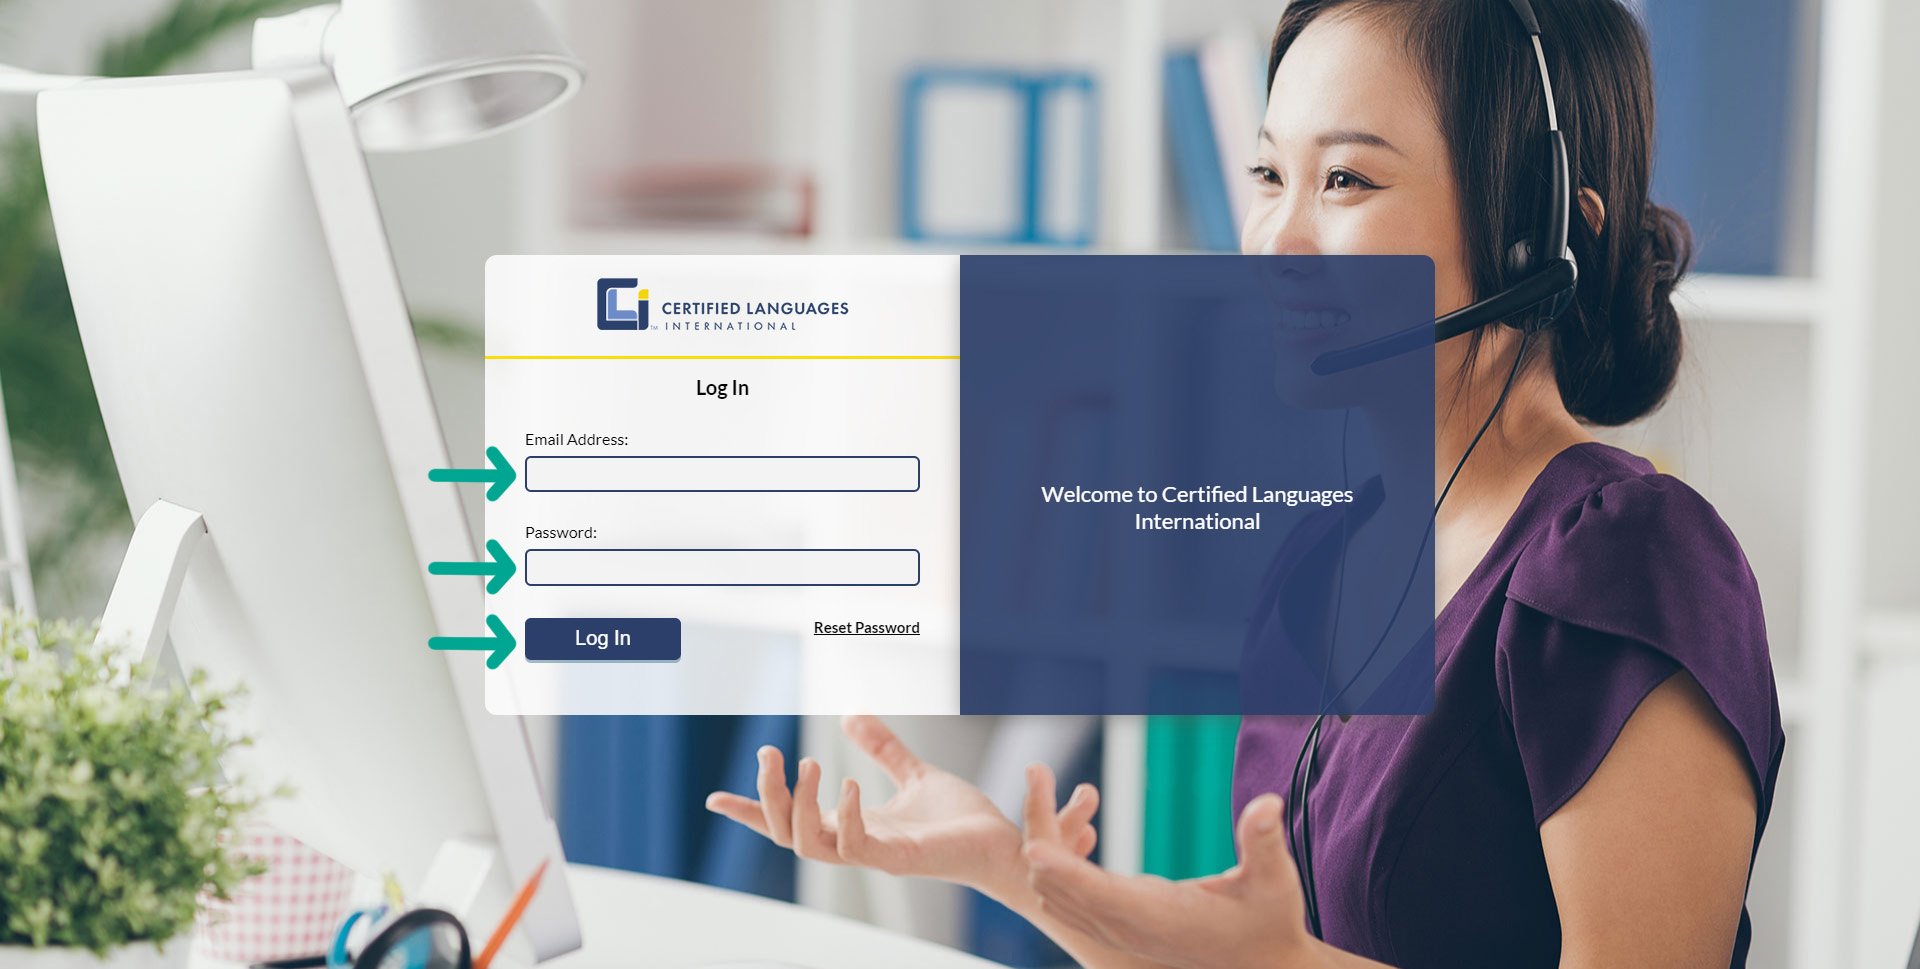
- Visit the MERFi interpreter login page
- Enter your email address and password, and click Log In.
- Note: If you haven’t created a password yet, please see Step 1.
Step 3: MERFi Home Page
- When you log in for the first time, the site will ask for your permission to access your microphone and camera. Click Allow.
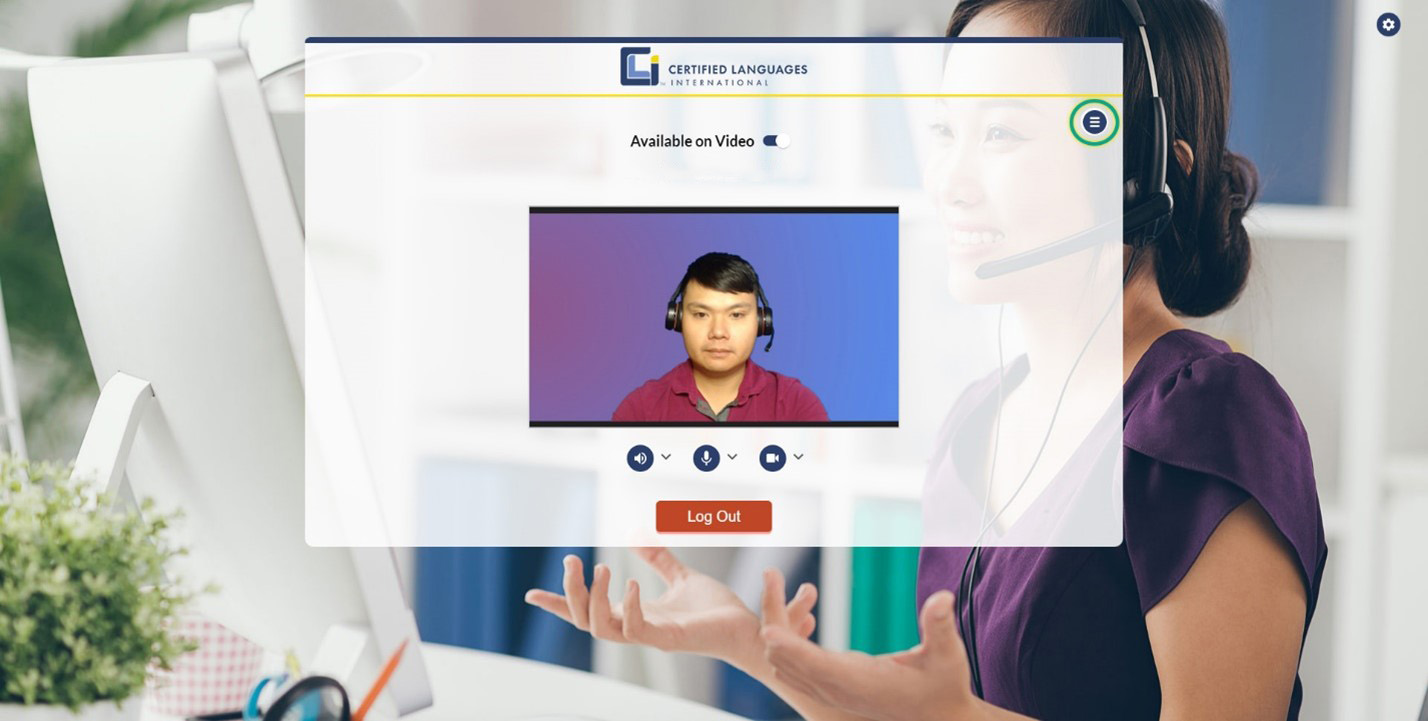
- You should now see the MERFi home page with a preview of yourself.
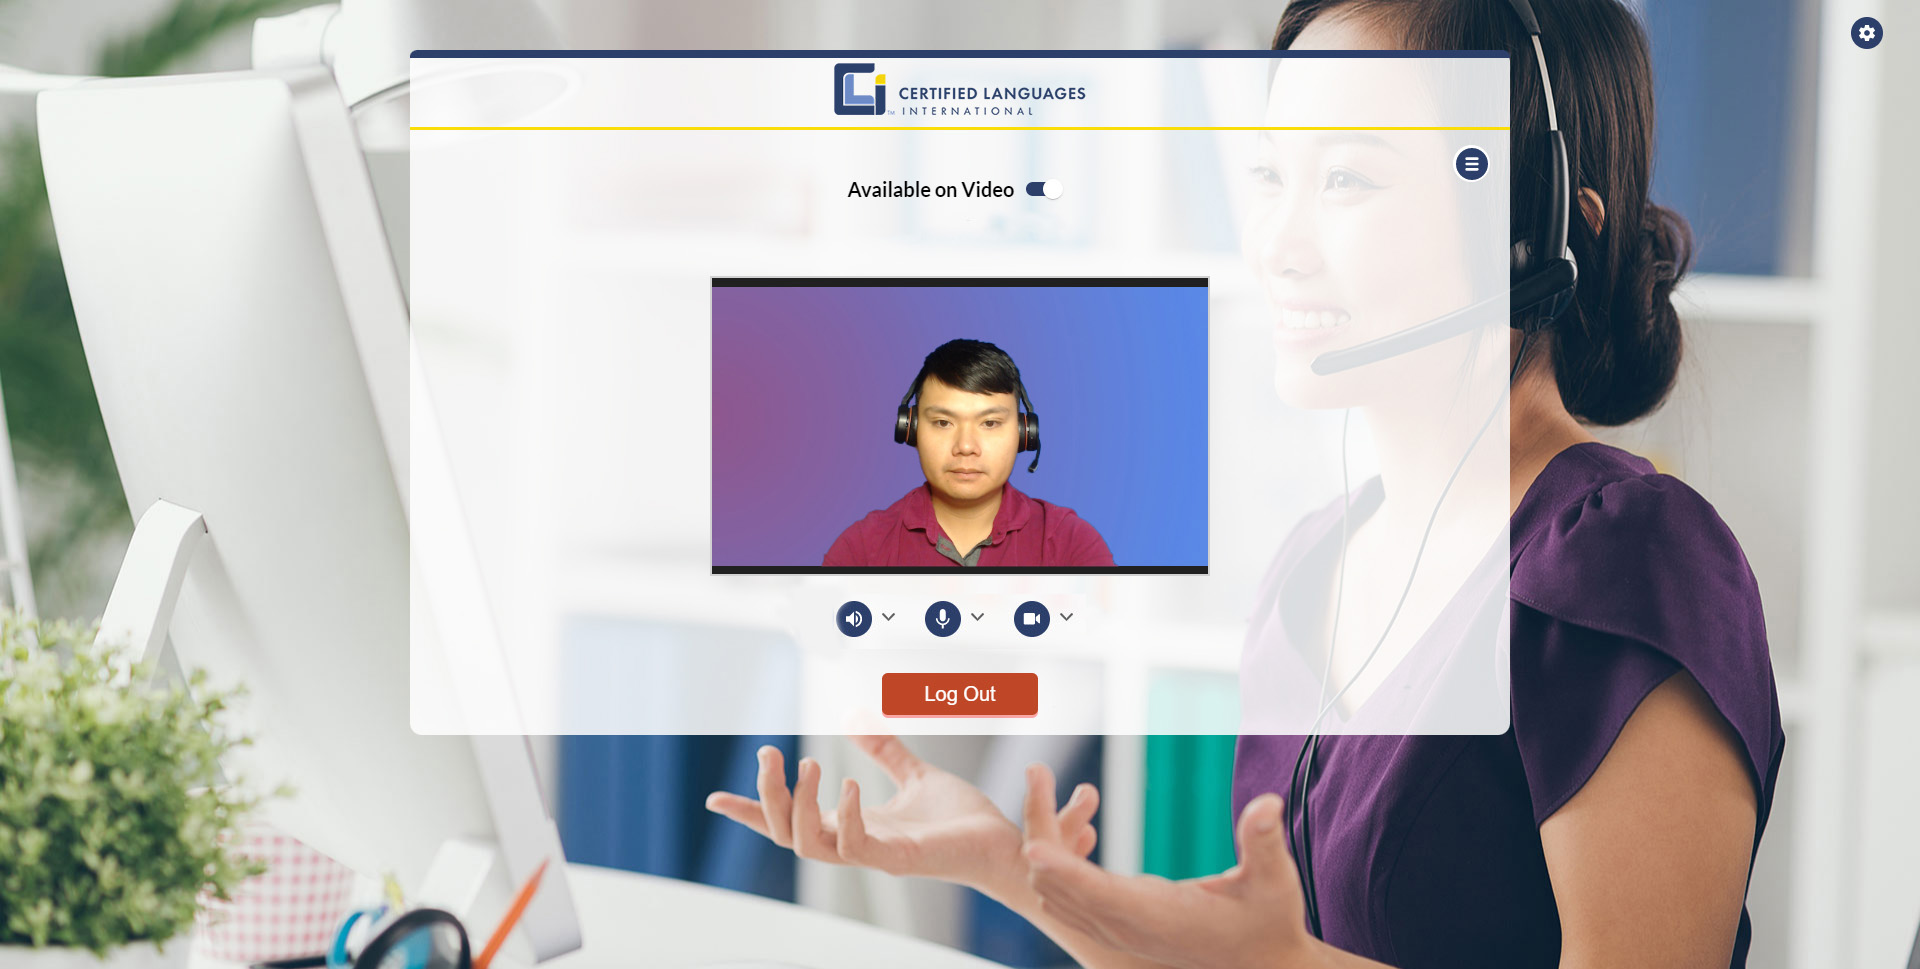
Step 4: MERFi Statuses
Available on Video
When Available on Video is toggled on, you’re available to receive video (VRI) requests. It will default to the on position every time you log on.
When this is toggled off, you’re no longer available to receive video (VRI) requests.
Log Out
This will log you out of the video platform.
Step 5: Toolbox Settings
Below your video preview are settings for your Speaker, Microphone, and Camera.

- Click an icon to mute its functionality; the icon will turn red.
- Click the icon again to return its functionality; the icon will turn dark blue.
Your settings will carry over to your next session. You will still have access to mute, unmute, and change your speaker or microphone when you’re in an active session.
Speaker
Your speaker allows you to hear other people in an active session.
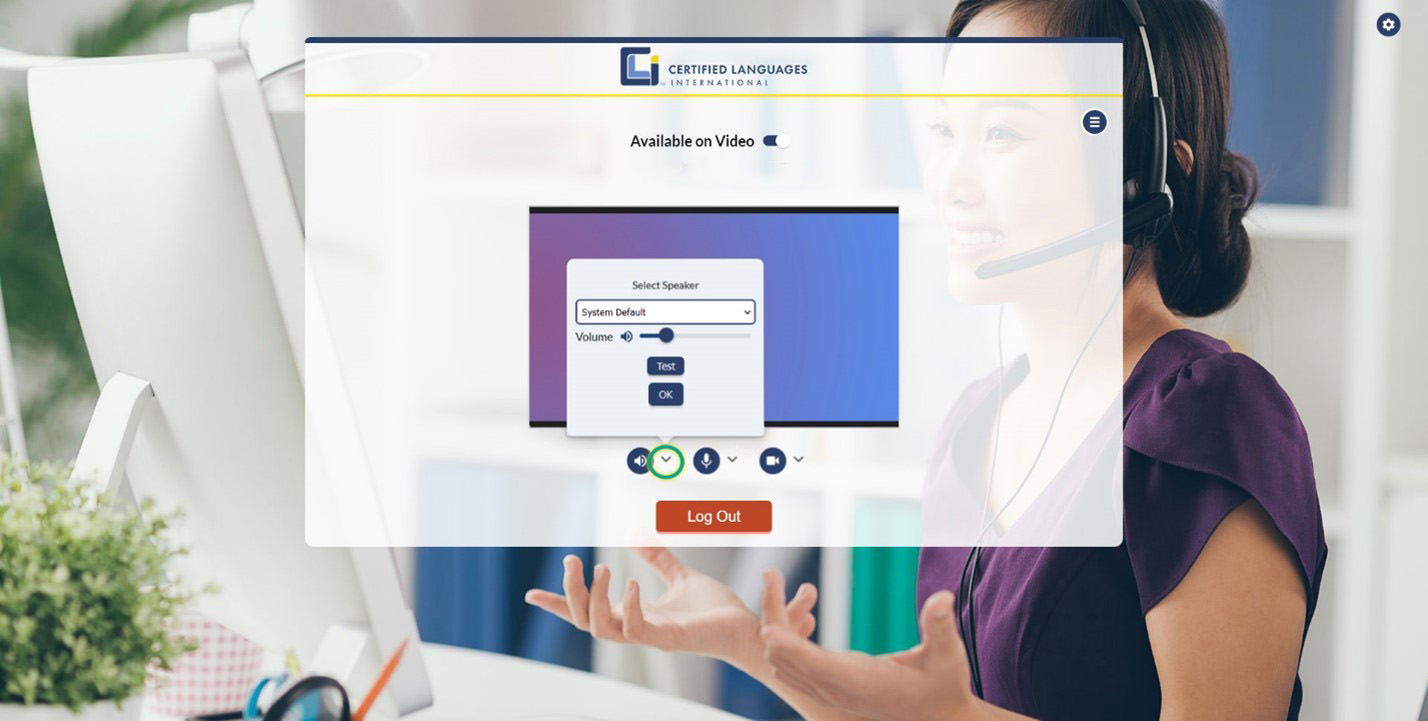
- Click the arrow to review the speaker options.
- Click the arrow under Select Speaker to change your speaker settings.
- The Volume slider adjusts the volume on your speakers.
- Test your speaker and volume level by clicking the Test button to play a demo sound.
- Click OK to close the speaker options.
Microphone
Your microphone allows others to hear you during an active session.
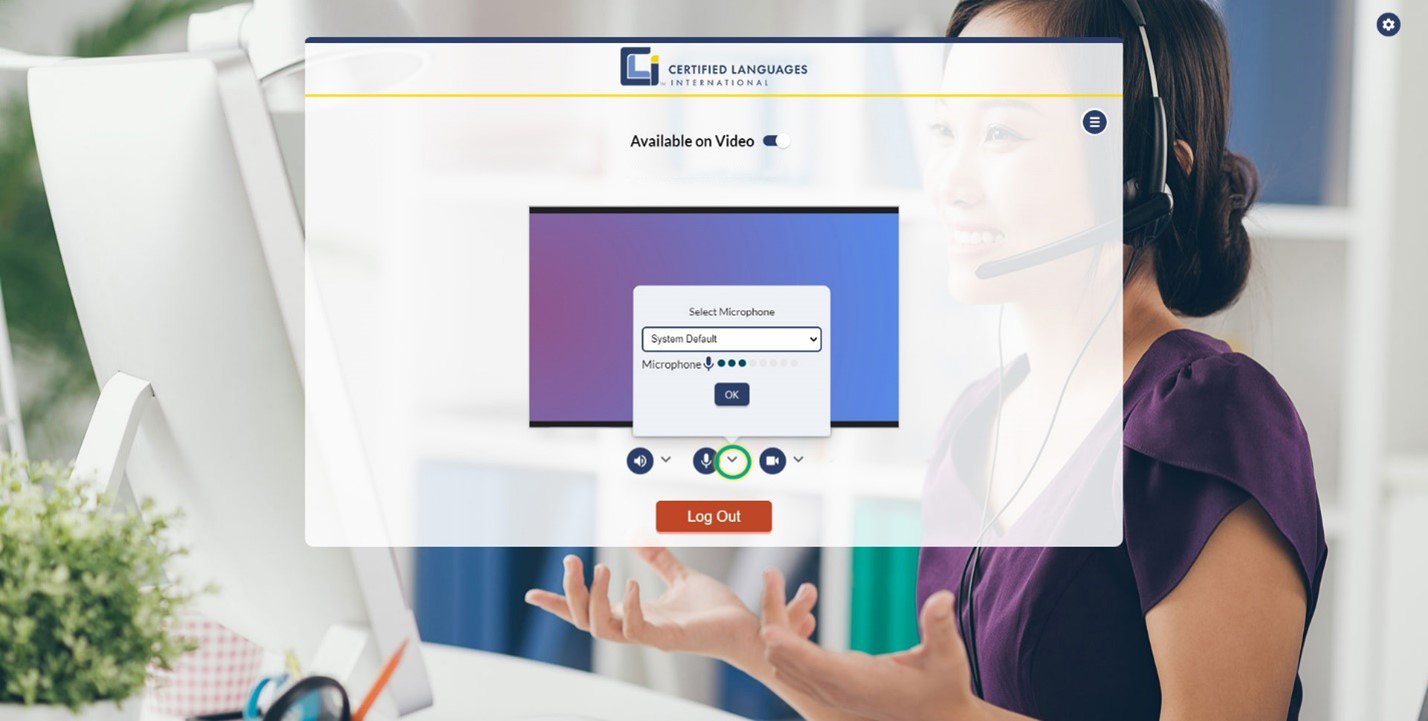
- Click the arrow to review the microphone options.
- Click the arrow under Select Microphone to change your microphone settings.
- Speak into your microphone, and watch for the blue dots to rise and fall with your voice. This indicates your microphone is working properly.
- Click OK to close the microphone options.
Camera
Your camera allows other to see you in an active video session.
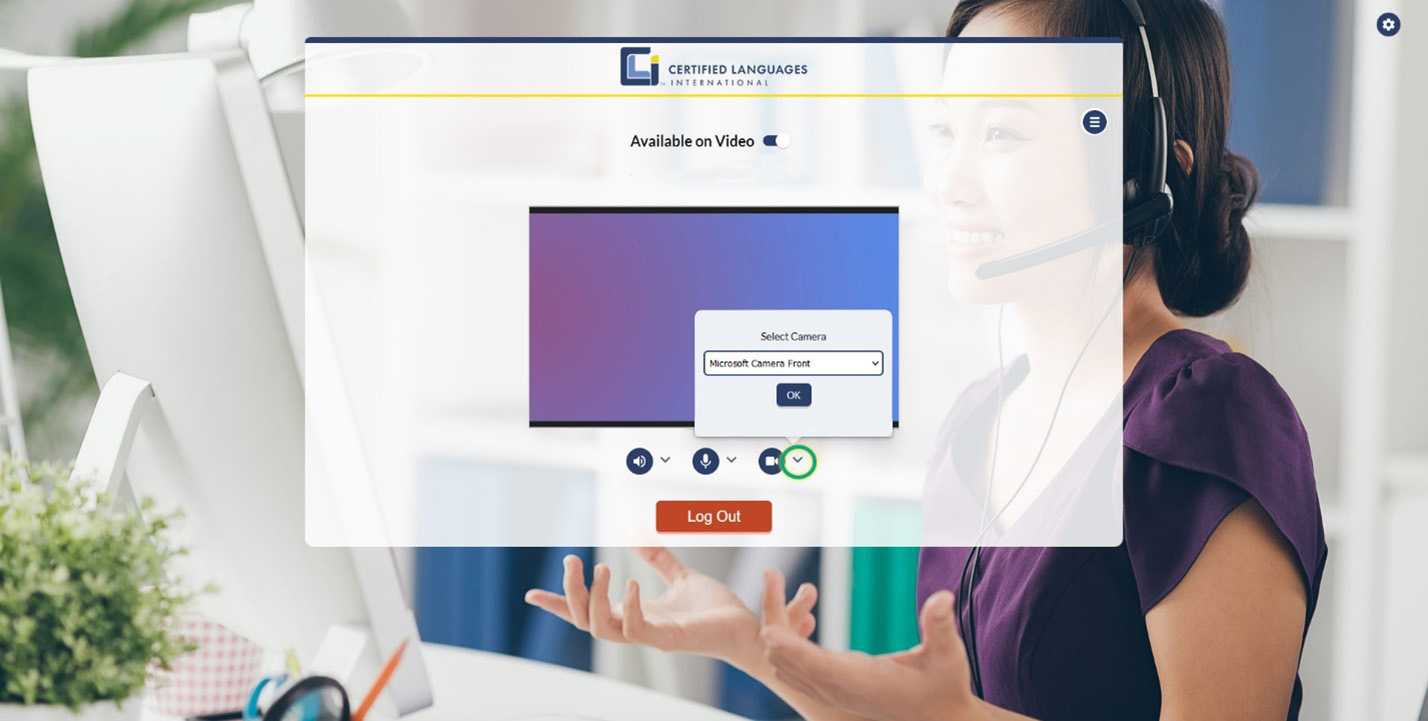
- Click the arrow to review the camera options.
- Click the arrow under Select Camera to change your camera settings.
- Click OK to close the camera options.
Step 6: Settings Menu
The Settings cog at the top right of the MERFi home page allows you to configure your notification settings.
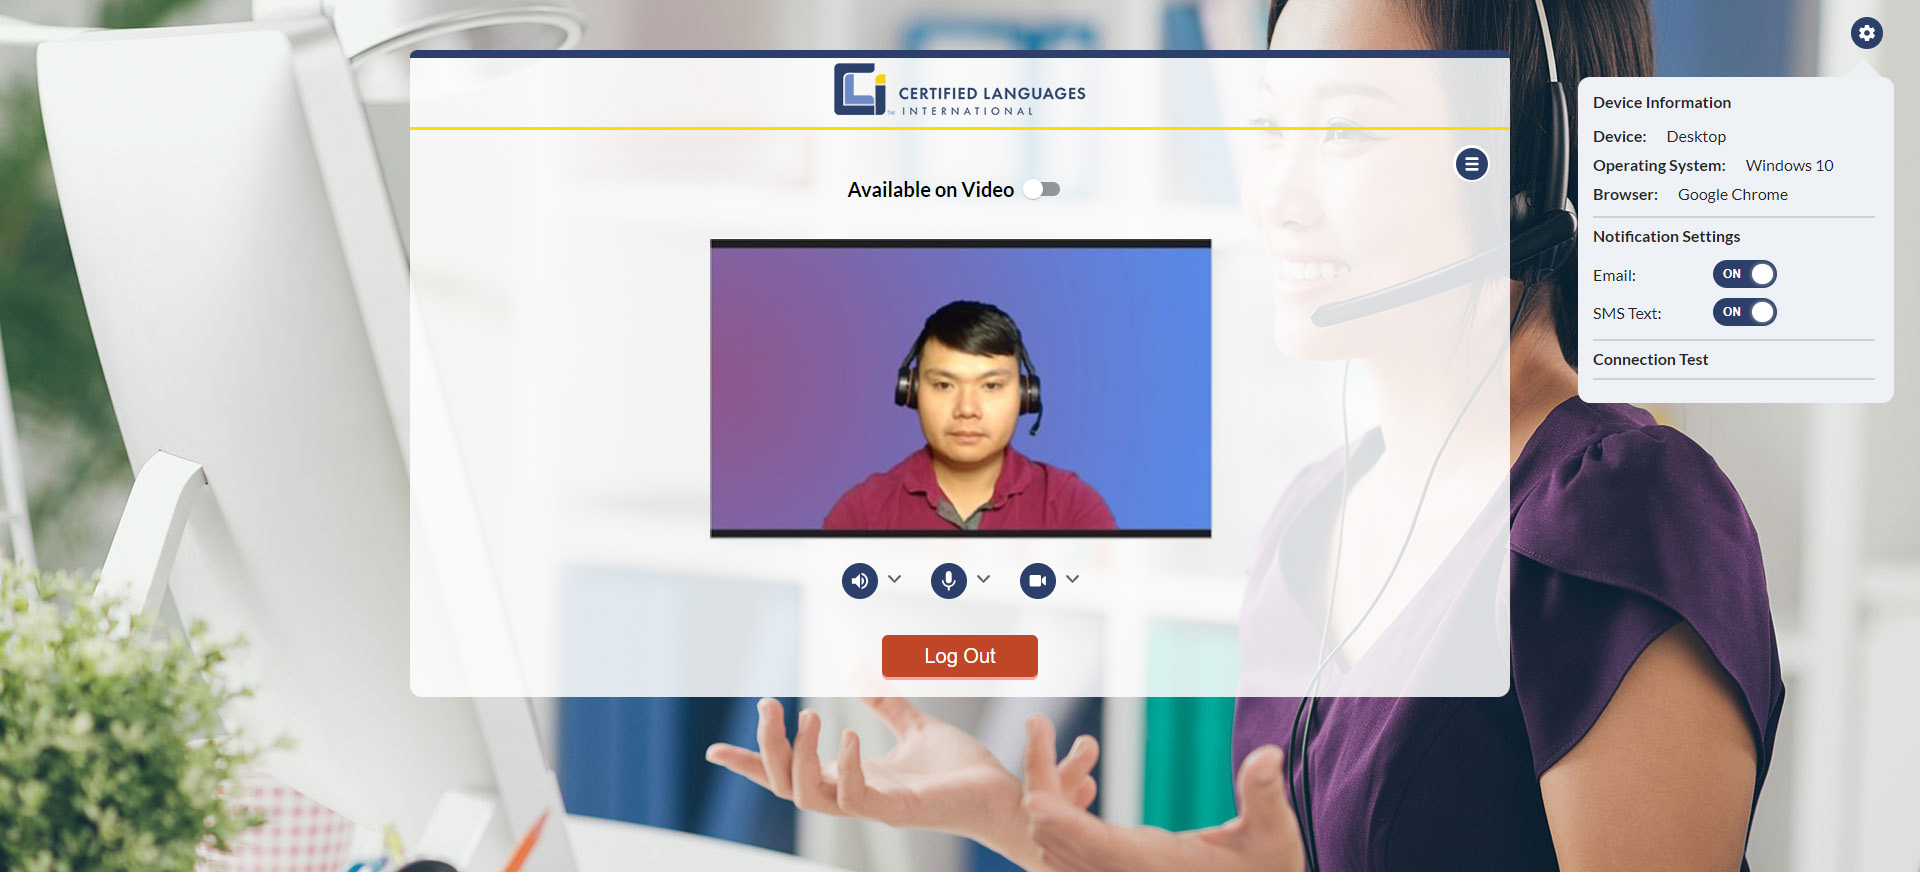
Device Information
Shows your device information including Device type, Operating System, and Browser.
Notification Settings
Displays your Email and SMS Text alert preferences. The system automatically sends out a text and/or email alert when a client is waiting for an interpreter.
- Toggle email and/or text ON if you’d like to receive these alerts.
- Toggle email and/or text OFF if you don’t want to receive these alerts.
The email address and mobile number used to send you the alerts are located in your organizations Admin Portal. If you need to change your email or phone number for surge alerts, please contact your administrator.
Step 7: Accepting a Video Call
When you receive an incoming call request, you will see a pop-up and hear an alert sound through your speaker.
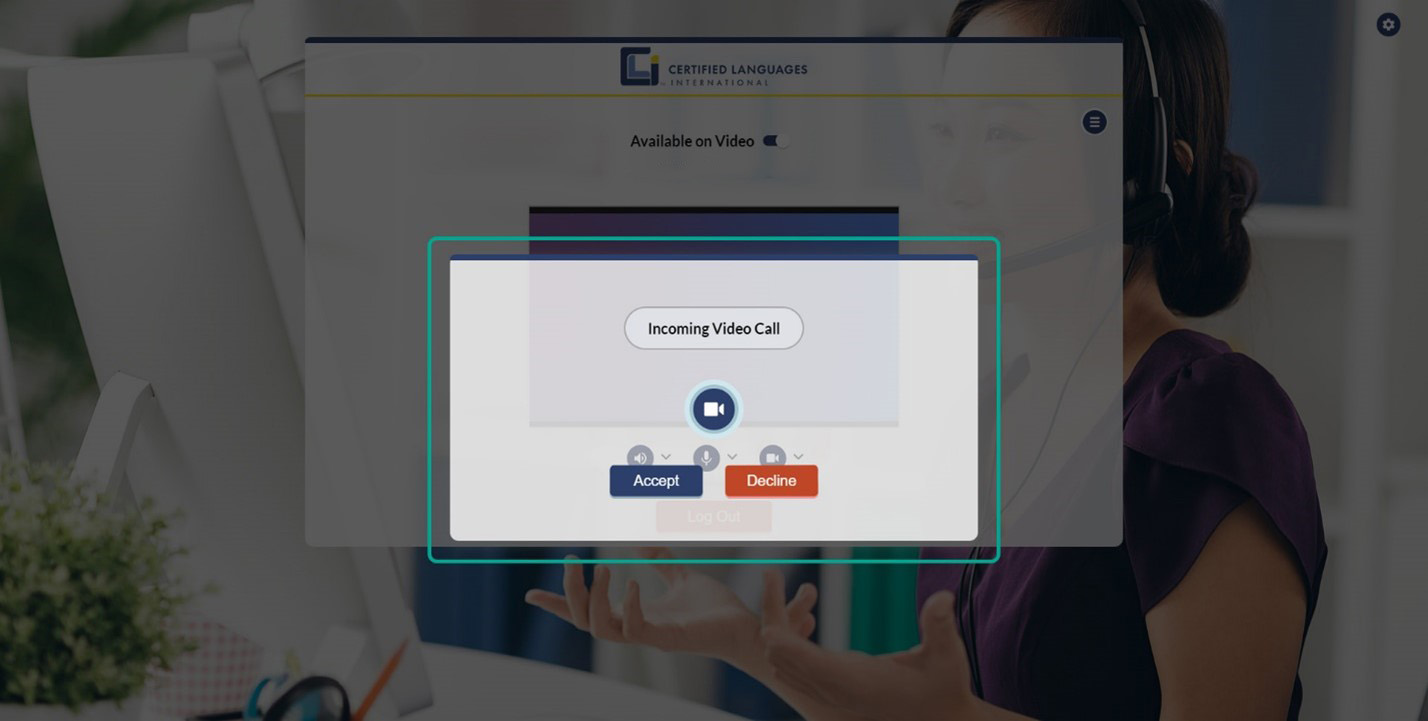
- Click Accept to join the video session.
- Click Decline to reject the call.
- Note: If you click Decline, your Available on Video status will be toggled to the OFF position until you are ready to toggle it back to the ON position.
Step 8: Video In-Call Screen and Meeting Controls
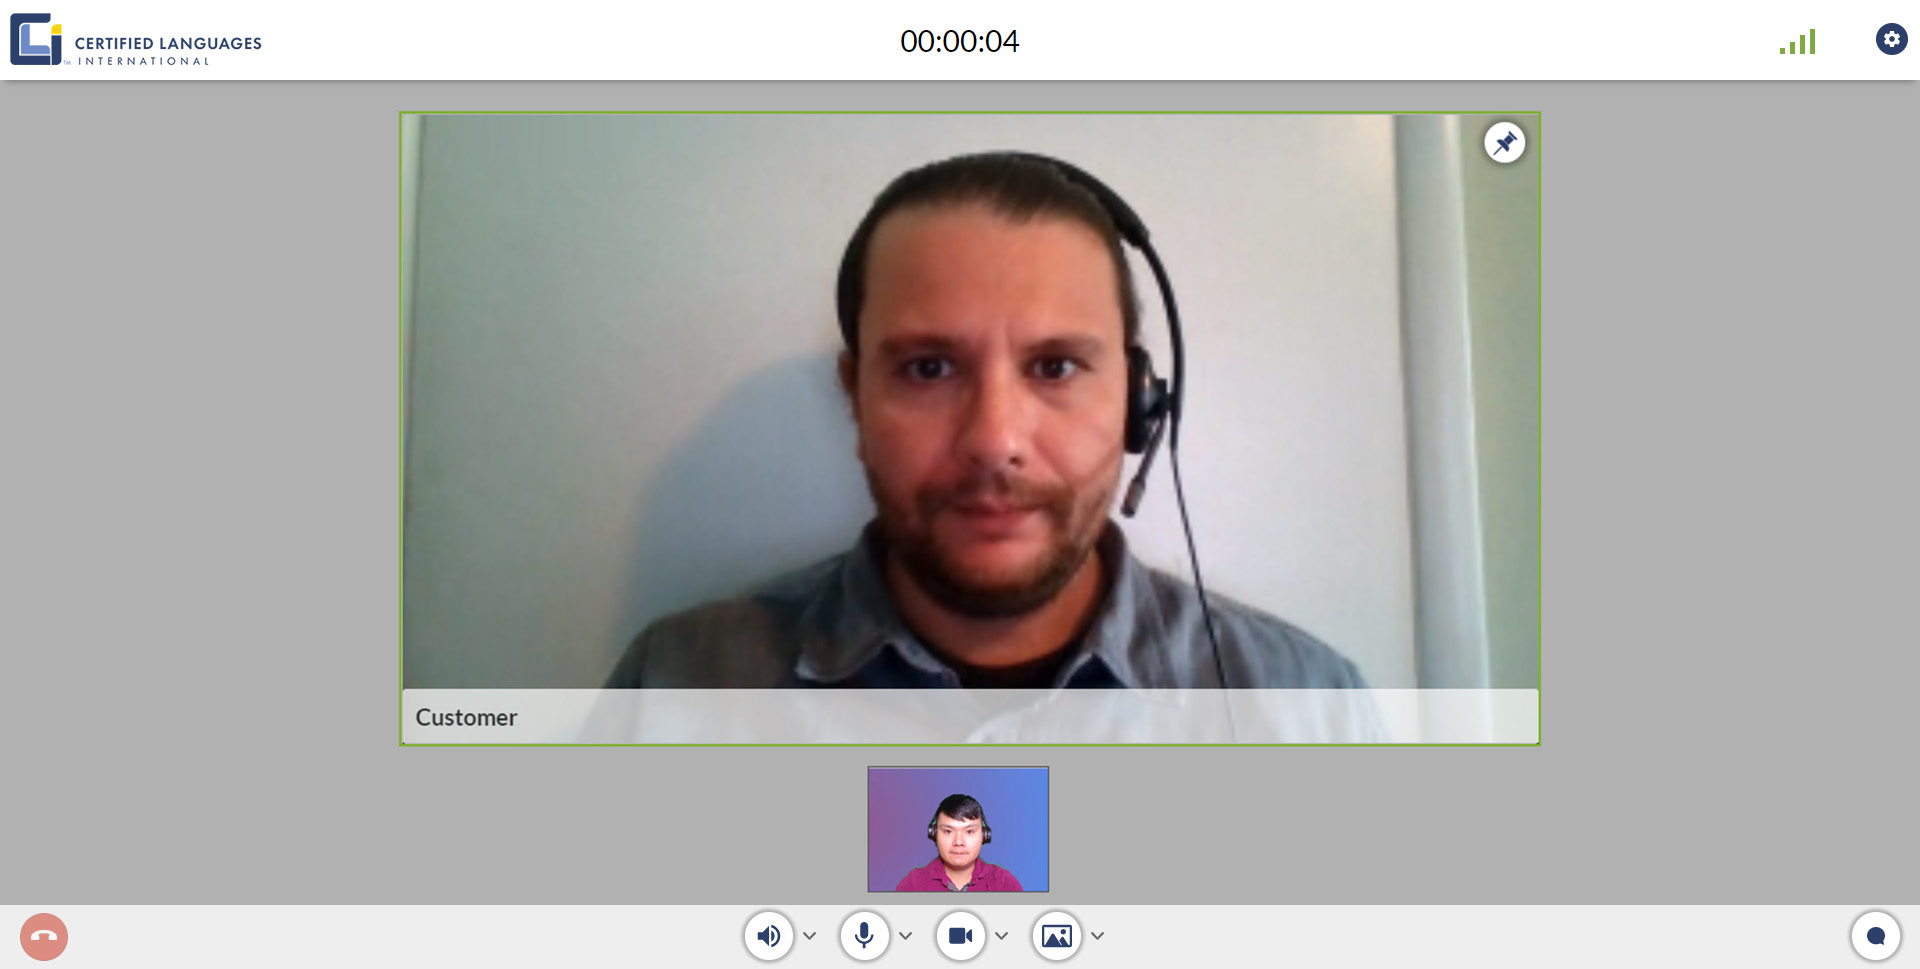
Timer
The Timer is located at the top center of your screen and lets you and all participants know how long the session is taking. The Timer will count up until the end of the session.
Client View
The client will appear on video in the center of the screen (labeled as Customer). If there are multiple participants in the session, each participant will appear side by side.
Pin Video
Pinning enlarges a participant’s video to full screen.
- Locate the Pin icon in the top right-corner of the participant’s video.
- Click Pin to enlarge participant’s video screen.
- Click Pin again to minimize participant’s video screen.
Self-View
The video of yourself will always display at the bottom center of the screen.
Speaker, Microphone, and Camera
Your Speaker, Microphone, and Camera controls are located at the bottom of your screen. Please see Step 5 for information on how each functions.
The client has the ability to mute other participants, but they cannot un-mute other participants. If you are muted by the client, you may need to un-mute yourself to continue the session or clarify any instructions.
Network Statistics
To access Network Statistics of your current session, click the Green Bar icon located at the top right of your screen.
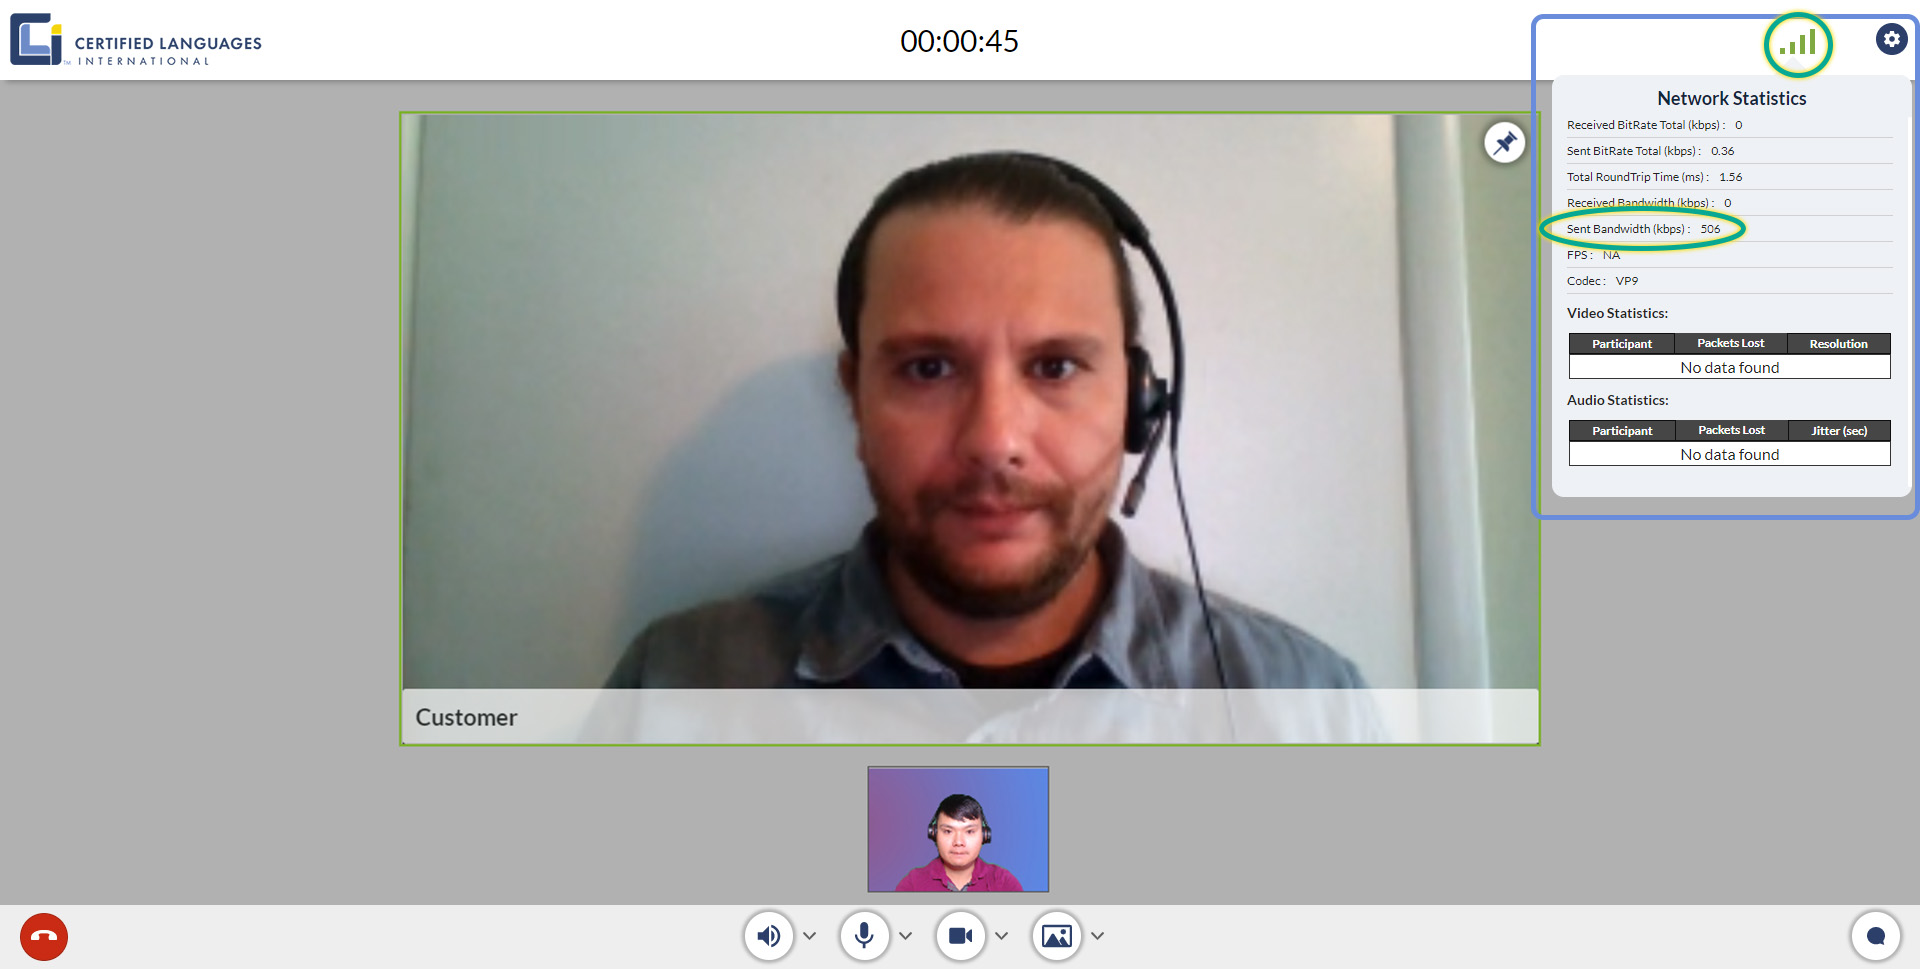
Your Sent Bandwidth should be above 500 kbps to ensure a smooth session.
Chat
The Chat feature allows you to communicate in writing to all participants. It’s located on the bottom right of your screen.
- When you receive a message, a blue indicator will appear with the number of unread messages you have.
- Click the Chat icon to open up the conversation.
- You can type in the target language if necessary.
End Call
To disconnect from a call, click the red End Call icon on the bottom left of your screen.
Step 9: Disconnections Caused By Internet Speed (Bandwidth)
If you (or any other participant) get disconnected because of low bandwidth, you can be reconnected once your bandwidth is re-established.
If the client gets disconnected because of low bandwidth
- First, you may notice that the client’s image freezes.
- Next, the client’s image will disappear. You’ll see a gray screen, and you may see a pop-up message saying, “Customer has left the session.”
- The client has about 30 seconds to fix their bandwidth issue.
- If the client was not able to reconnect, you’ll see this message:
“Customer session could not be established due to connectivity issues. You will be disconnected now.”
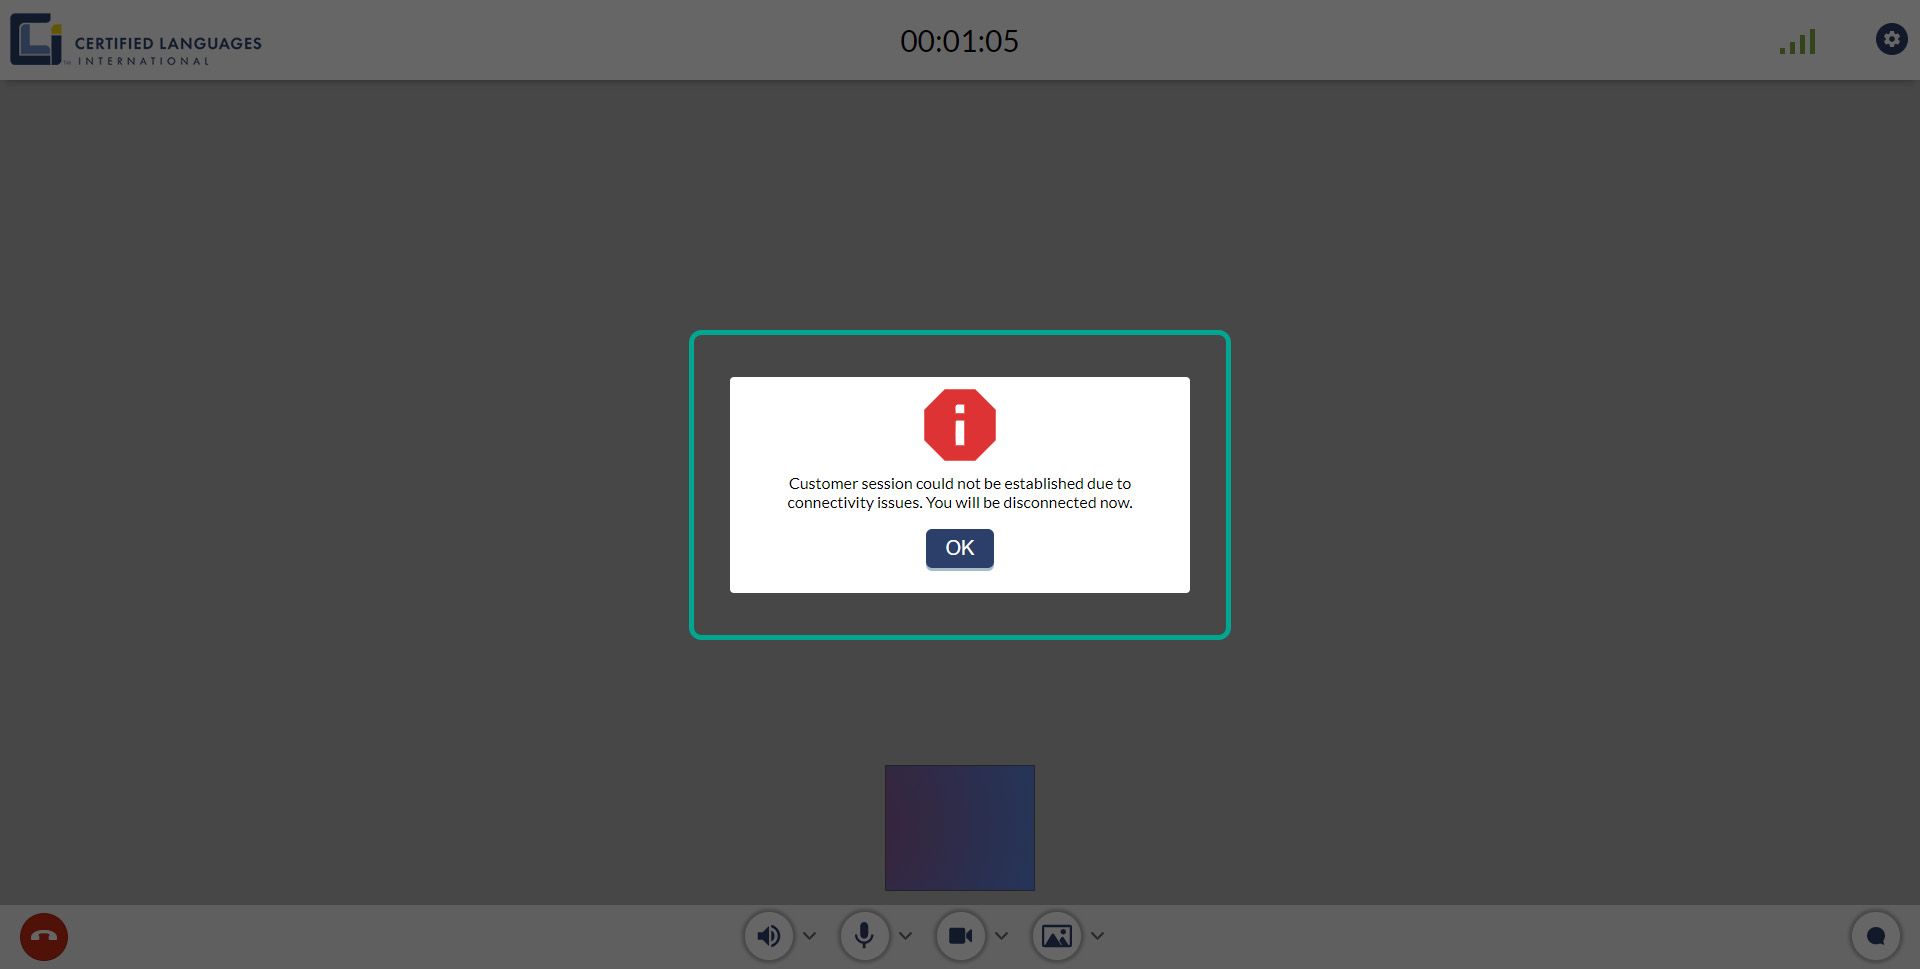
- Click OK to end the call.
If you get disconnected because of low bandwidth
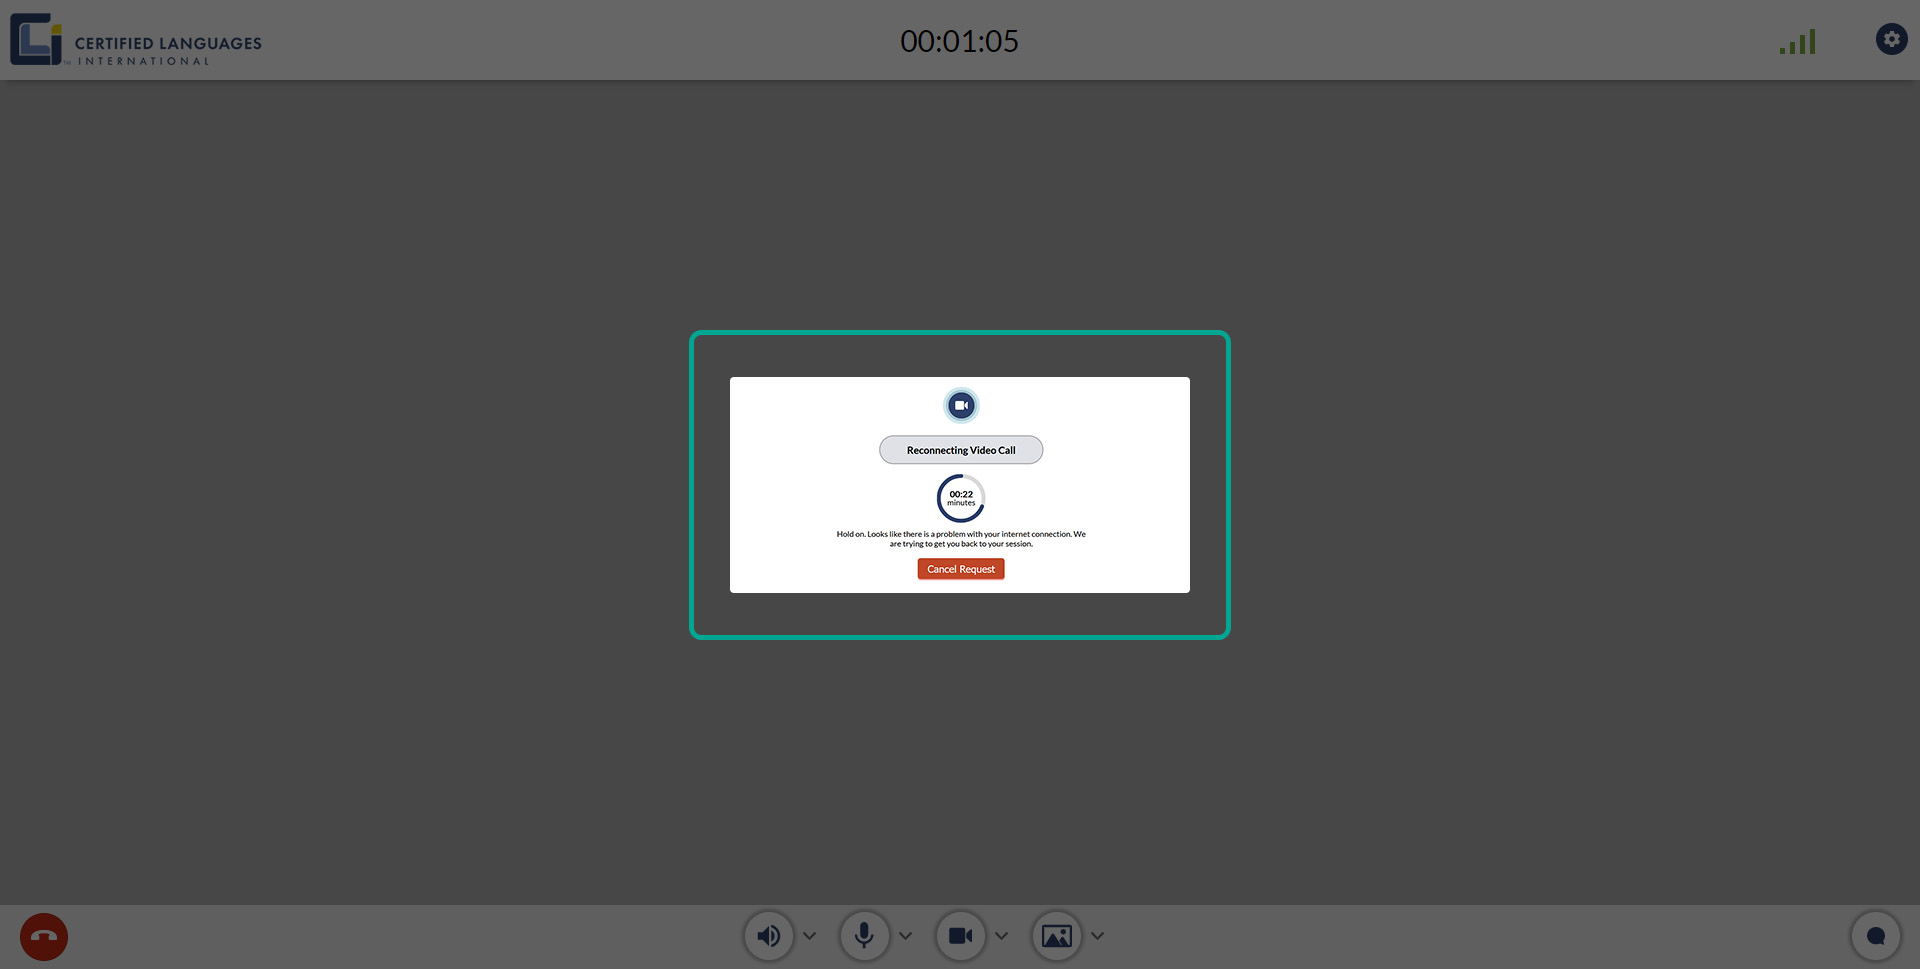
- If your internet bandwidth drops or gets cut off, the platform will give you 30 seconds to reconnect.
- You will see this message:
“Hold on. Looks like there is a problem with your internet connection. We are trying to get you back to your session.”
- If your bandwidth returns to speeds that support a video call, you will be reconnected to the call and can proceed as normal.
- If you are not able to reconnect, your session will end, you will be logged out of the platform. You’ll see this message:
“Due to an unstable connection, you will be logged out. Please check your internet connection before logging back in.”
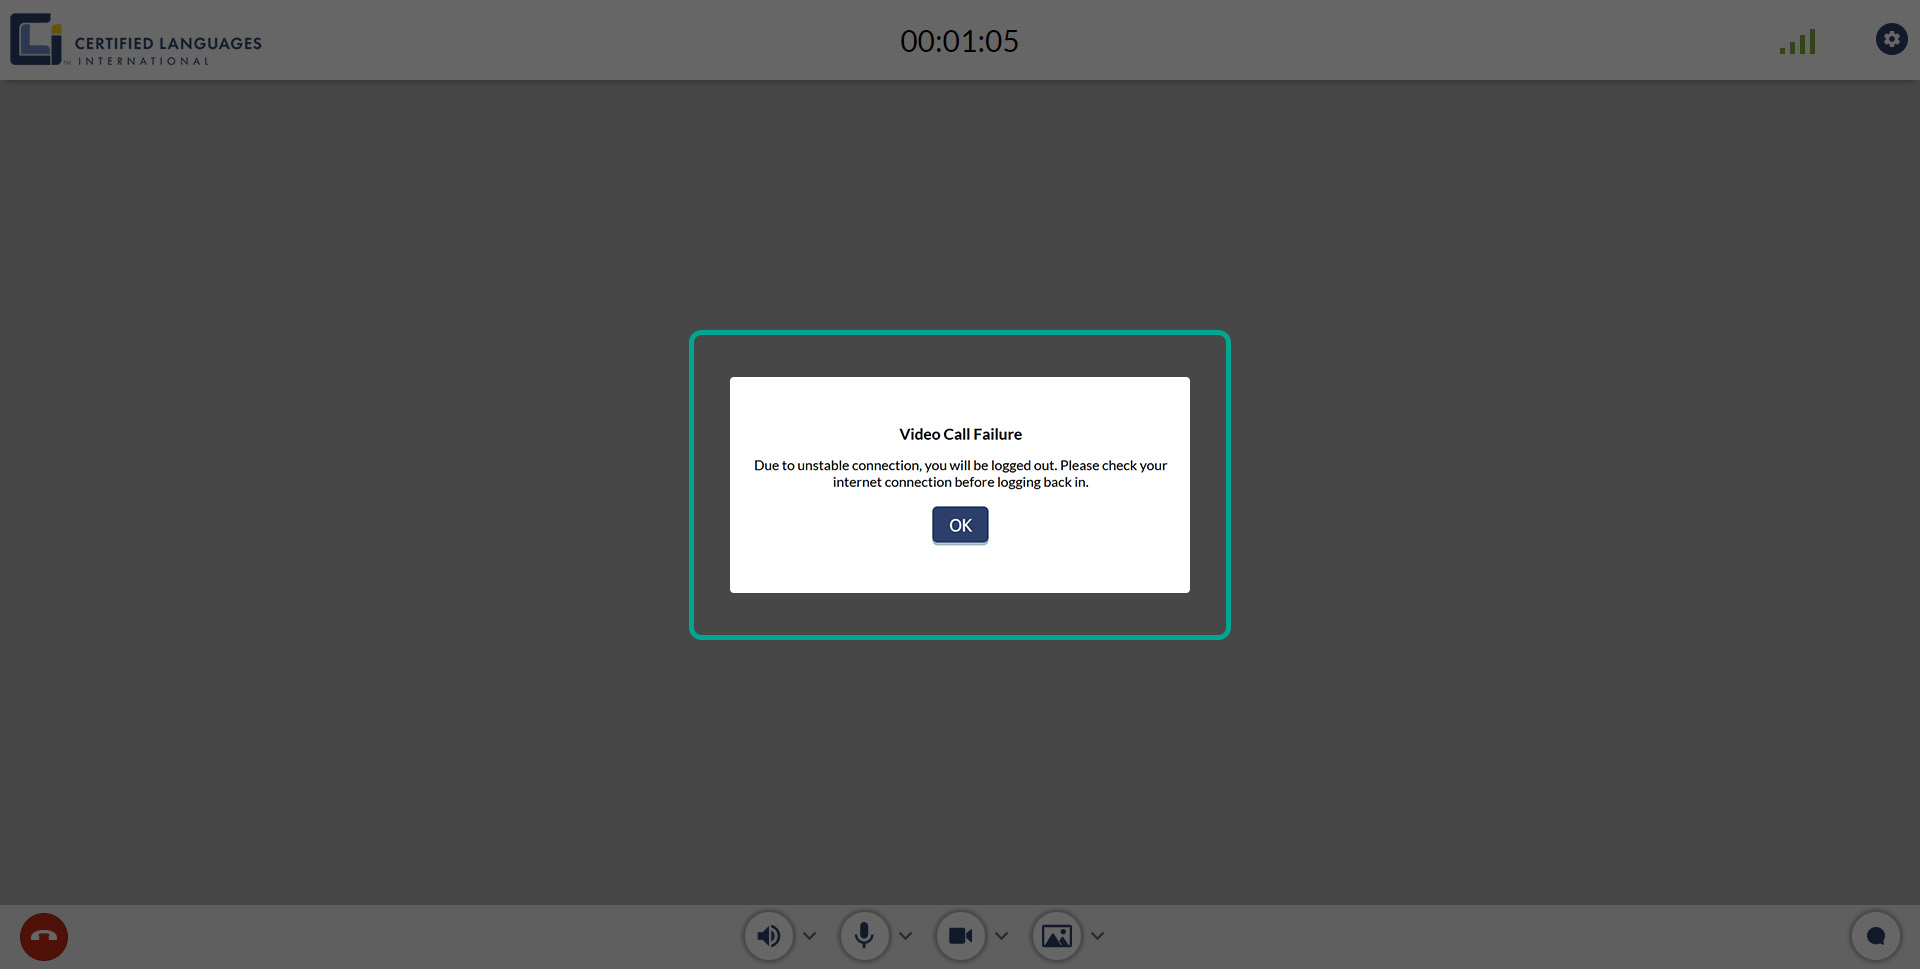
- Click OK to close this window.
- Once you have sufficient bandwidth, you can log back in again.
Step 10: Rate the Call
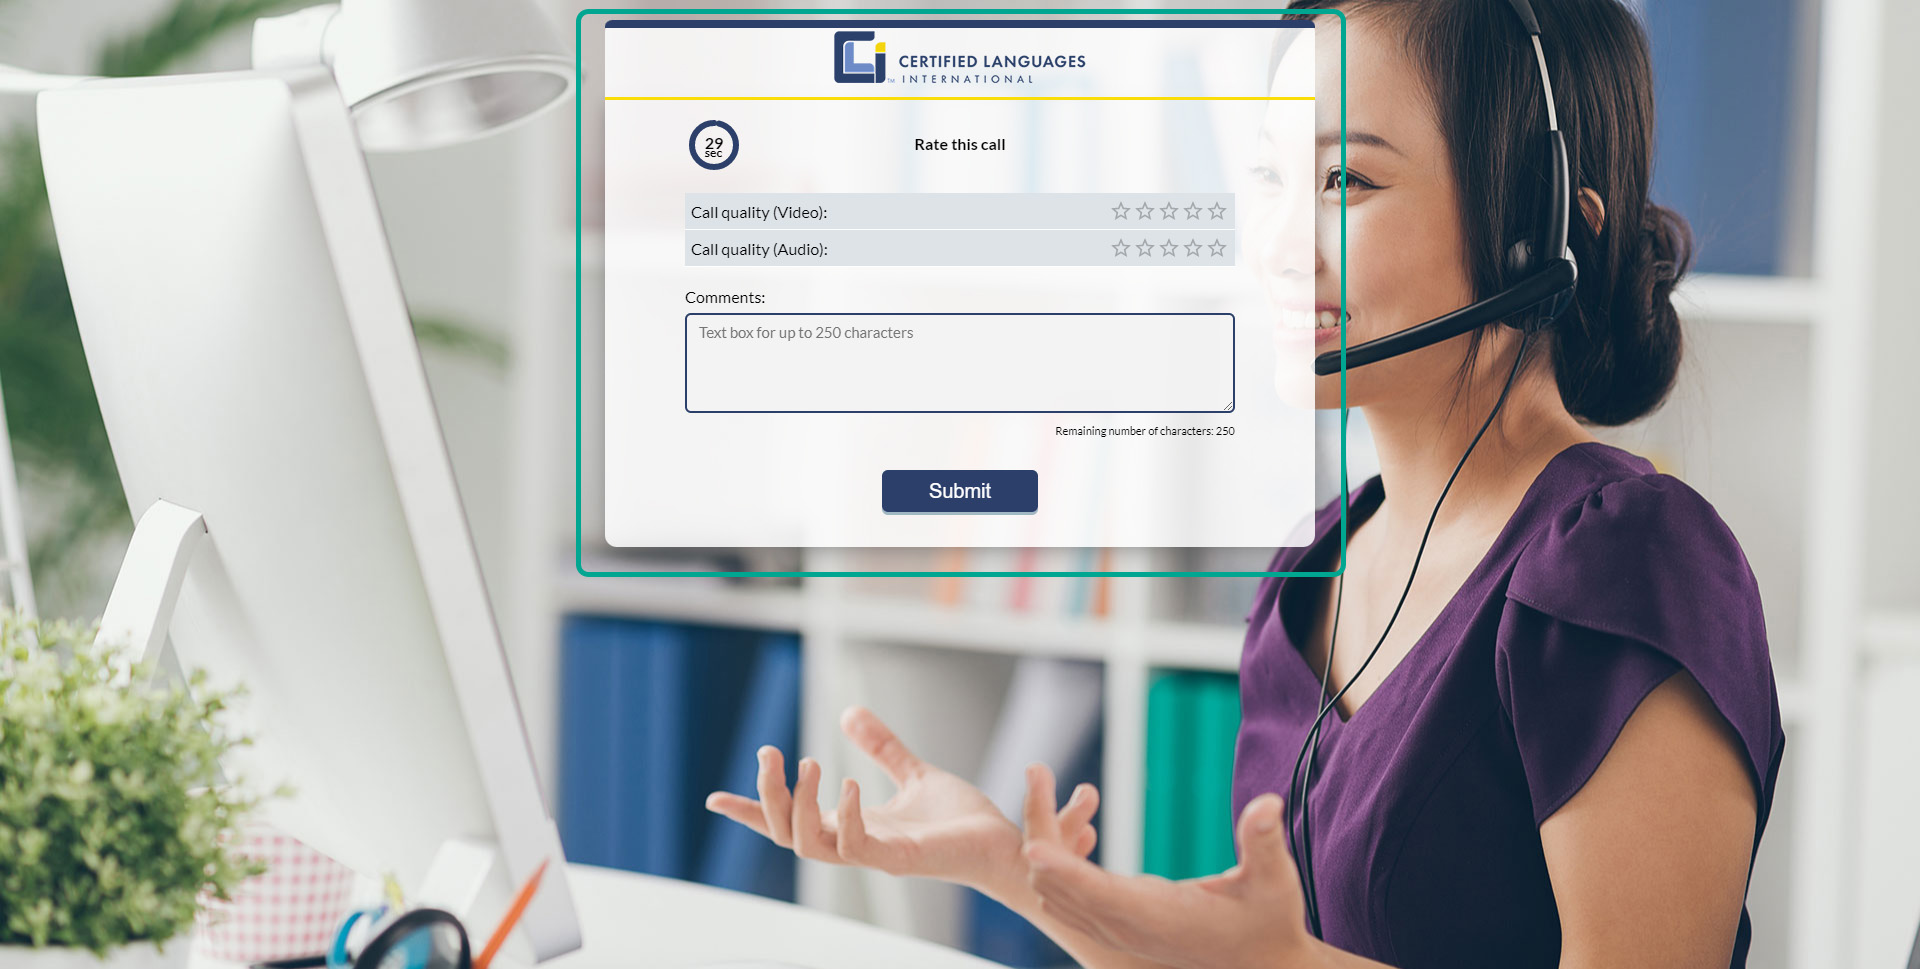
When the session ends, you can Rate the Call. Fill in the stars for video and audio quality. We also encouraged you to type in any comments.
You will have 30 seconds to submit a rating. The timer at the top left indicates how much time you have to rate the call. At the end of 30 seconds, the rating screen will close, and you will be redirected to the home page where you can receive your next call.
Step 11: Accepting/Declining a Scheduled Call
When a customer requests an interpreter for a scheduled session, you will be able to accept or decline the appointment from the portal.
You can check all available appointments for your language by clicking the Scheduled Call menu at the top right of your home page.
- Click the Scheduled Calls menu to show a list of available calls.
- You will see the Date and Time (in Pacific Time) for each appointment.
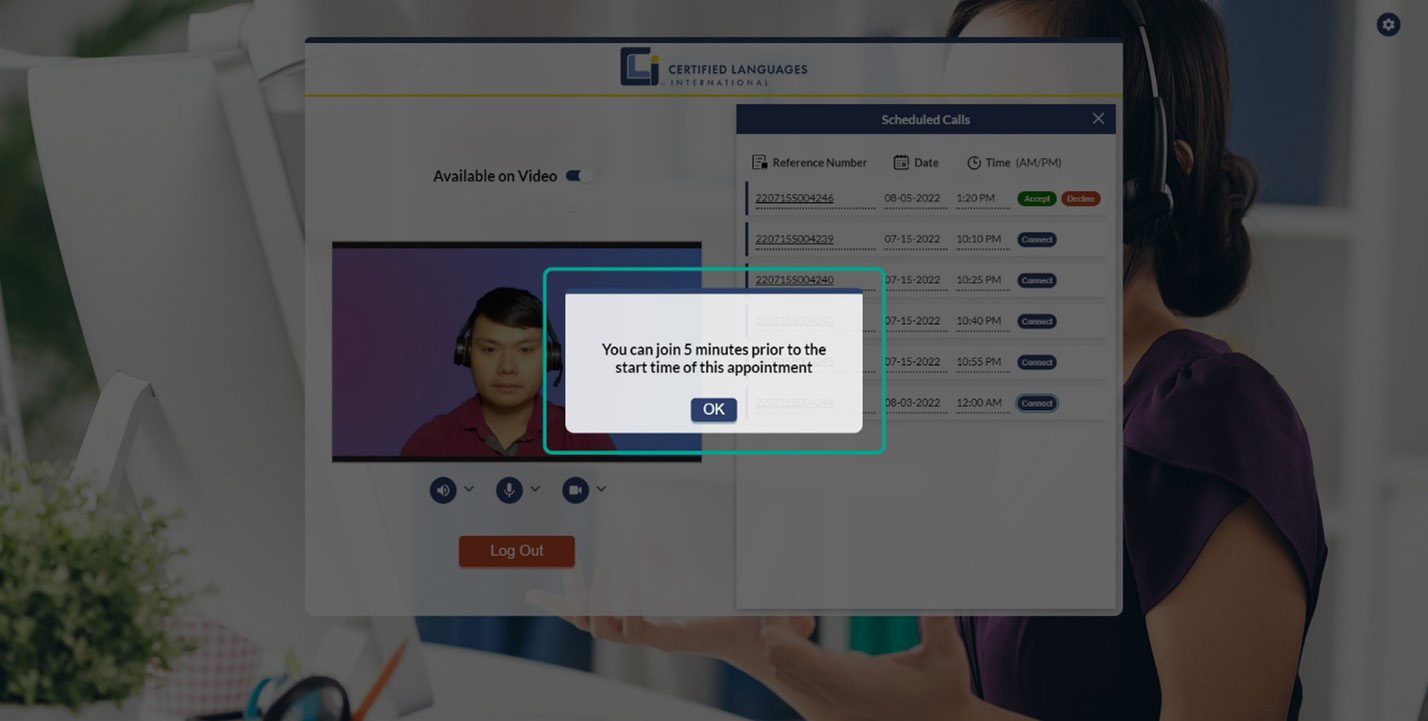
- Calls you accept will move to the bottom of the list, and a Connect button will appear.
- Note: You will not be able to join a scheduled session until at least 5 minutes prior to the scheduled start time.
- Appointments you Decline will disappear from the list.
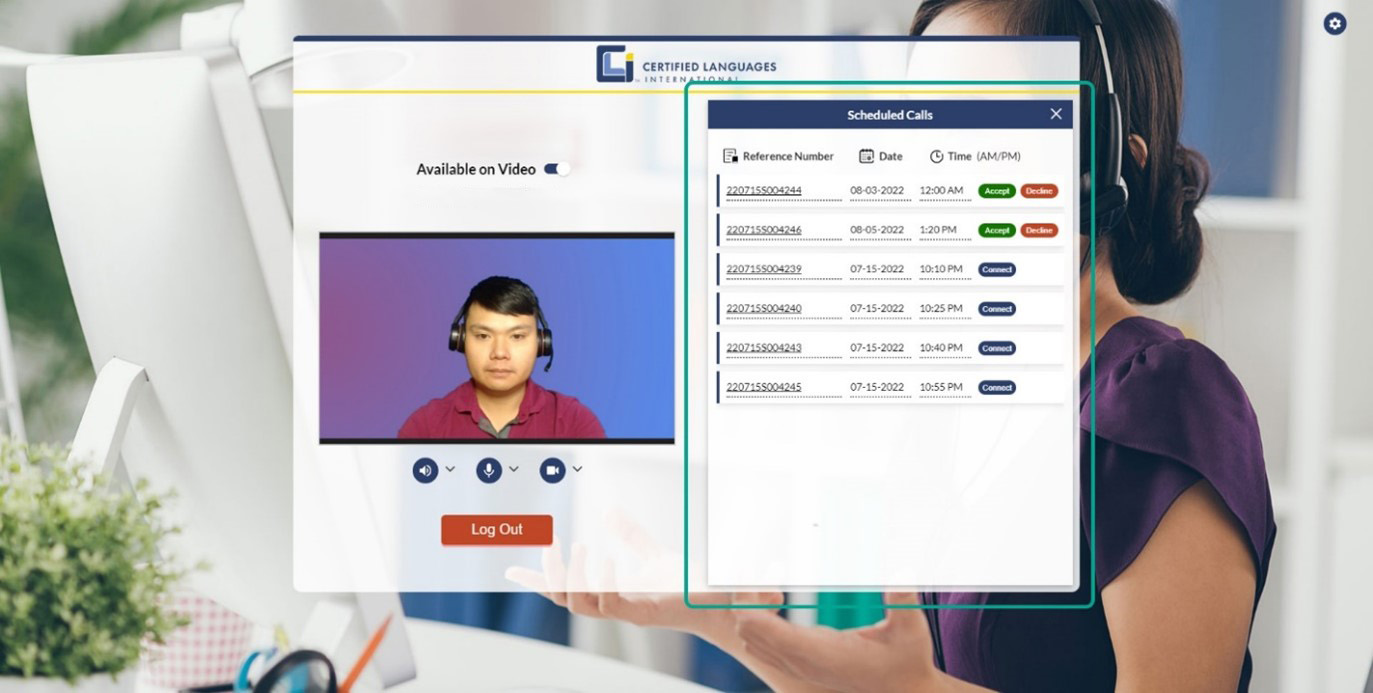
Scheduled calls go to the first interpreter to accept the appointment. If an appointment is not accepted by any interpreter, CLI interpreters will be notified of the appointment request.
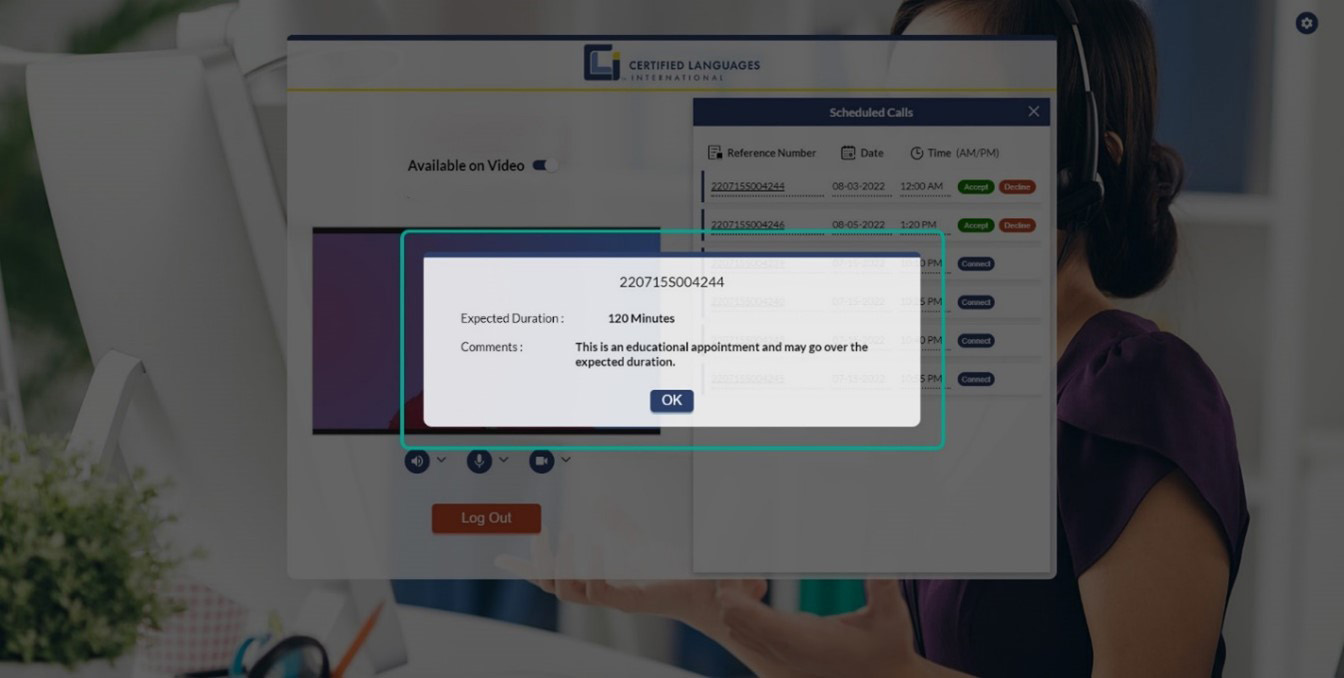
- Click on the Reference Number of each call to view more details.
- Comments are special instructions from the client.
- Hit OK to exit details
When you accept a scheduled appointment, you will receive an automated email confirmation from DoNotReply@clilang.com with the subject “You are scheduled for an appointment.”
The content of the email will have the date and time of the appointment and an order number for your reference.
The appointment time is displayed in Pacific Time in the Scheduled Calls menu and the automated confirmation email.
Step 12: Joining a Scheduled Call
- Navigate to the Scheduled Calls menu.
- Click the Connect button on your appointment.
- Note: You will not be able to join a scheduled session until at least 5 minutes prior to the scheduled start time.
- When the customer connects on their end, you will see them in a regular in-call screen.